 English
 Dansk
Dansk Deutsch
 English
 Español
 Français
 Hrvatski
 Italiano
 Magyar
 Nederlands
 Norsk
Norsk Polski
 Română
 Slovenský
 Slovenščina
 Suomi
Suomi Svenska
 Čeština
 Ελληνική
 Български
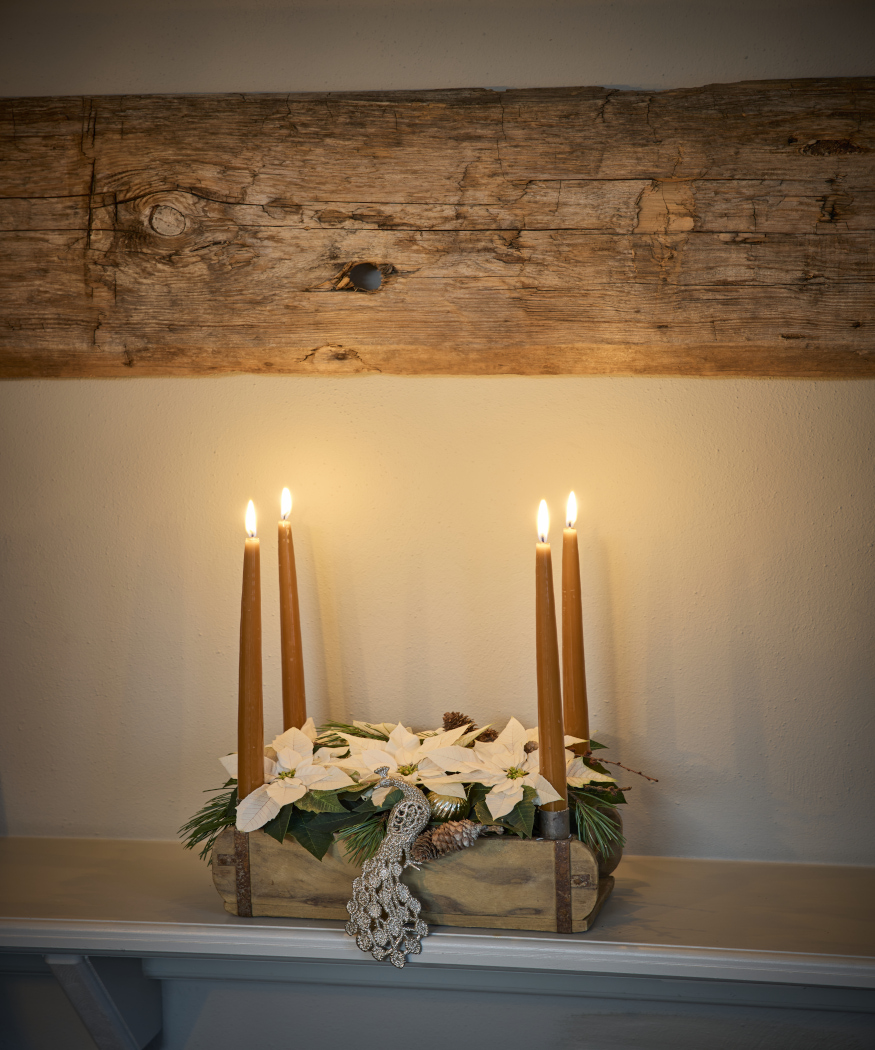
The poinsettia (widely known as the Christmas Star) is the classic Christmas plant. With its bright red, star-shaped bracts, it is a symbol of the festive season and one of the bestselling flowering houseplants. Now available in a wide range of colours, shapes and sizes, it provides a splash of colour not only at during the festive season but throughout autumn and winter. However, Advent and Christmastime remain its peak season: whether as a kokedama, cut flower or pot plant, it brings a festive atmosphere to any home and adds a touch of glamour to classic Christmas decorations. The decoration experts at Stars for Europe (SfE) share their Advent and Christmas tree decorations featuring this colourful winter bloomer.
Advent arrangements and Christmas tree decorations with poinsettia kokedamas
Kokedamas originated in Japan. The term ‘kokedama’ translates as ‘moss ball’ and is an apt description of what this is: a technique for wrapping the root balls of plants in moss. It makes colourful mini poinsettias a real attraction – ideal for creative Advent arrangements or as original, living Christmas tree decorations, as the following ideas show.
Left:
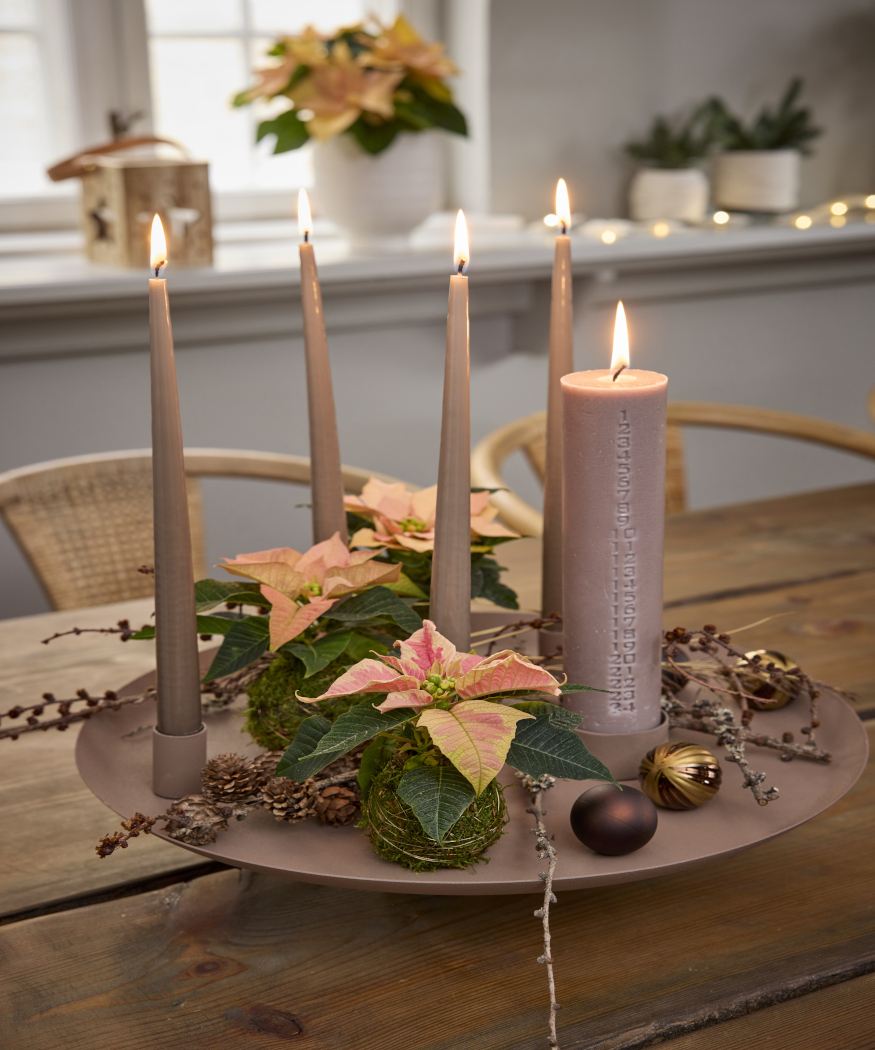
On a simple, sand-coloured Advent platter with magnetic candle holders, slender tapered candles and a large calendar candle in a matching shade create spots of warm light.
Mini poinsettia kokedamas in soft apricot, cream and pink tones, as well as natural twigs, cones and subtle baubles complete this stylish Scandi look.
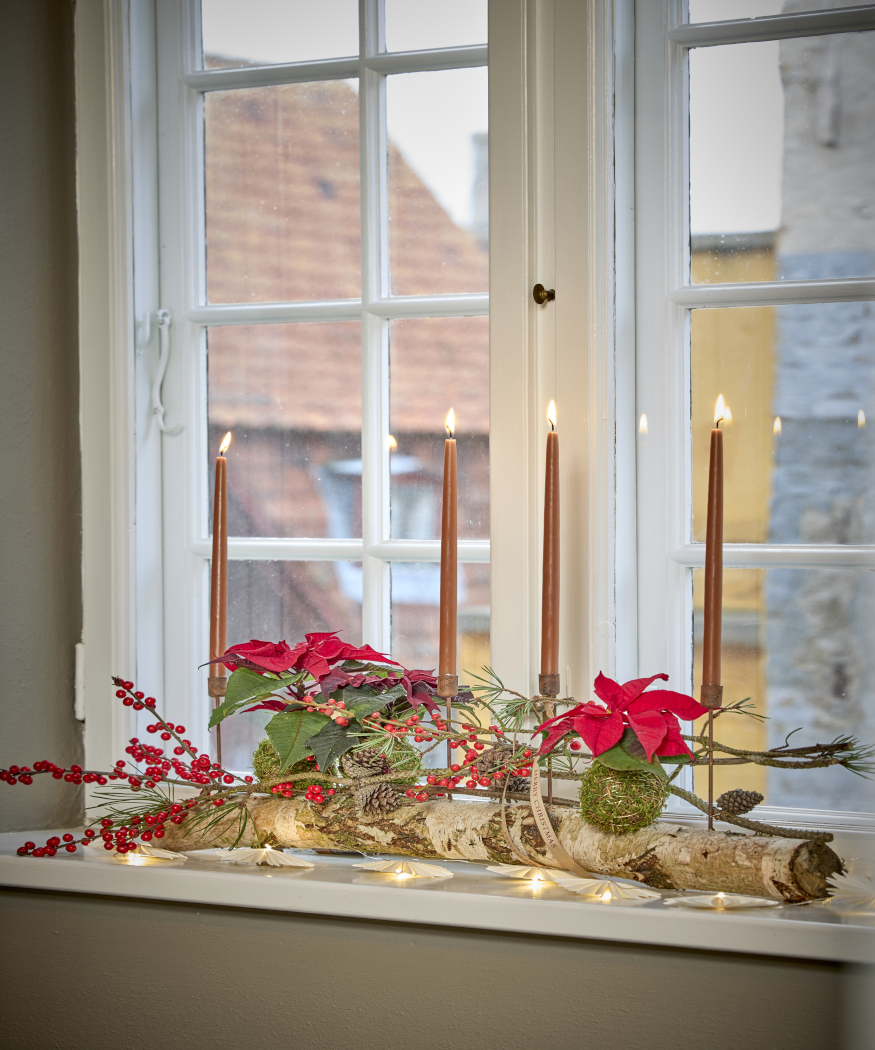
The window display on the right brings nature and festive cosiness into the room.
A birch log with holes for candlesticks forms the base for four slender, caramel-toned, taper candles.
Kokedamas of bright red mini poinsettias appear to float on thin wooden sticks above a winter scene.
Together with winterberry (Ilex verticillata) branches, cones and a delicate string of lights, this harmonious arrangement brings Advent to life.
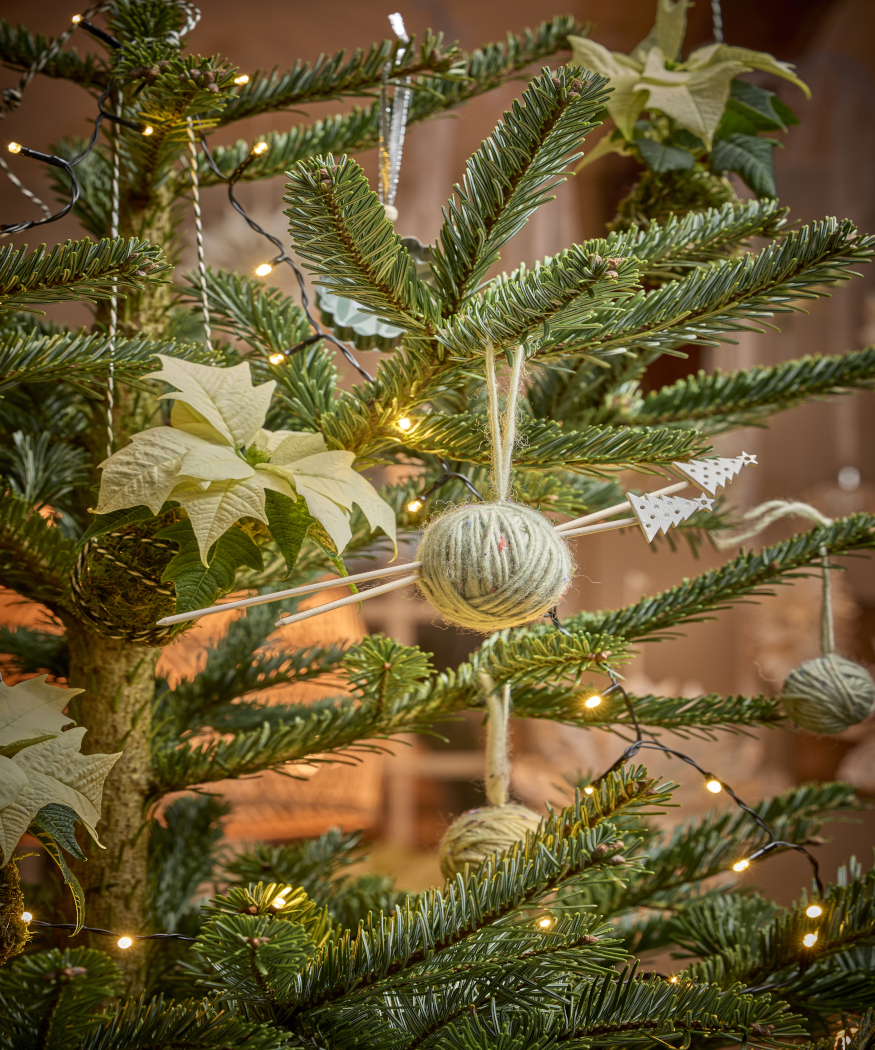
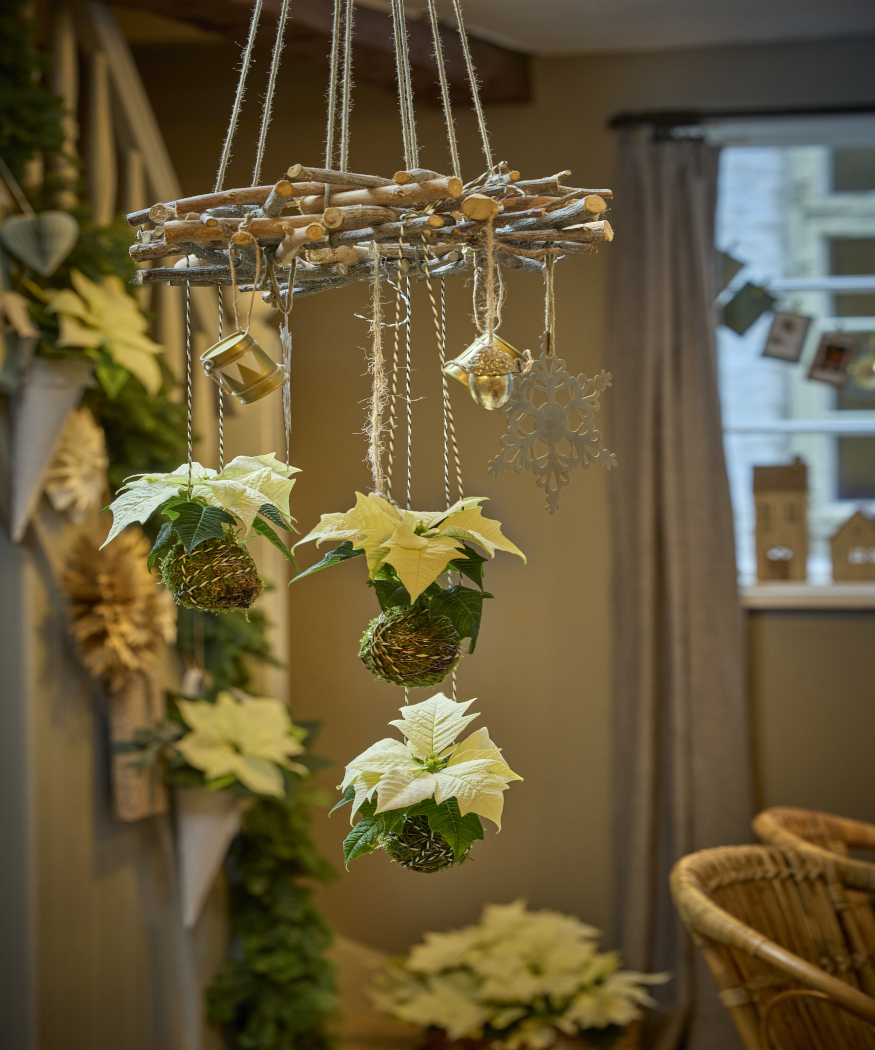
On this Christmas tree on the left, cream mini poinsettias, in the form of kokedamas, hover between the branches like little, natural works of art.
Hanging decorations of balls of wools, with tiny wooden Christmas tree knitting needles poked through them, complete the look.
The combination of natural materials and attention to detail gives this tree a warm, creative look.
Right: A rustic, natural wreath of branches suspended from the ceiling and decorated with creamy-white poinsettia kokamas brings natural elegance to this room.
Festive hanging decorations provide additional accents and turn this hanging display into a stylish focal point.
Kokedamas are quick and easy to make. Water the plants well before starting.
Simply remove the mini poinsettias carefully from their pots, wrap the root balls in moss and secure with fine wire.
Later, you can either water the mini poinsettias gently from above or place the moss balls in lukewarm water for a short time to saturate them.
Christmas decoration ideas with cut poinsettias

Even as cut flowers, poinsettias can make Christmas decorations sparkle.
For this colourful, shimmering door wreath on the left, a straw wreath frame has been elaborately decorated with colourful baubles, little gifts, miniature Christmas trees and other festive accessories.
As a special highlight, three water-filled baubles adorned with cut poinsettias give the wreath a living, floral accent.
The playful combination of glossy, shimmering and matt finishes creates a charming retro aesthetic.
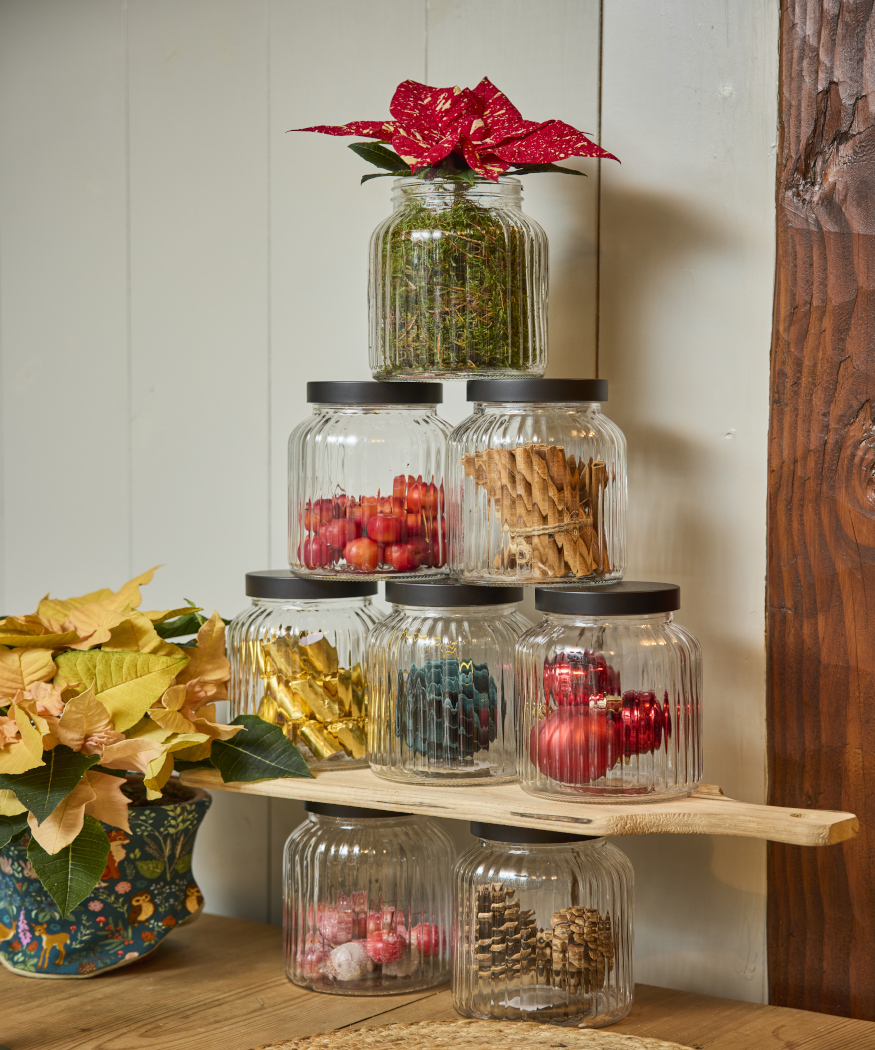
Right: Stacked storage jars filled with natural, seasonal and decorative items create an original Christmas tree silhouette and are a creative alternative to the classic festive fir.
Cinnamon sticks, apples, pine cones, baubles and golden crackers create a festive look.
The crowning glory is a speckled red-and-white poinsettia that glows from the top of the moss-filled jar – a charming idea and an unusual focal point with a Scandi feel.
As natural Christmas tree decorations, cut red poinsettias in water-filled test tubes create living highlights between balls of wool with knitting needles that playfully pick up on the theme of crafting.
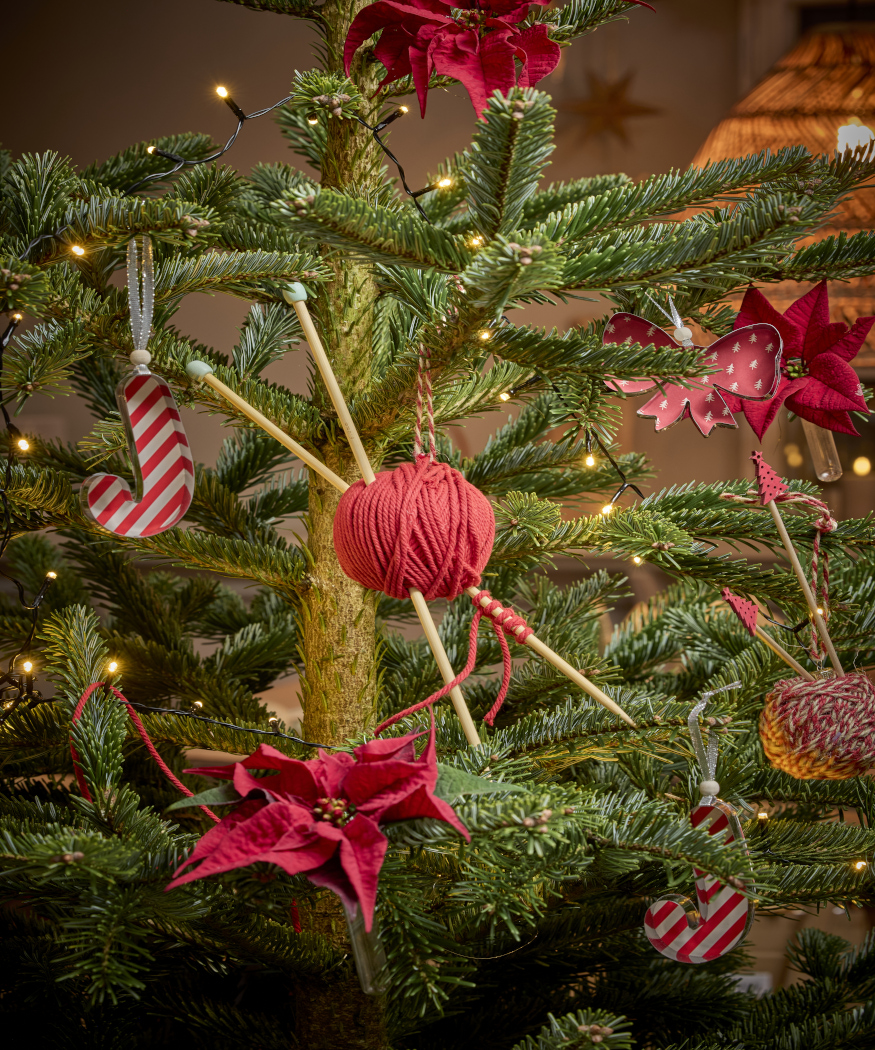

Individual upcycled decorations, featuring classic festive motifs, such as angels, gingerbread men and candy canes, also add a nostalgic touch. These homemade items are made from cookie cutters are backed with pretty paper. They add a creative yet traditional touch to the Christmas tree.
Tip: Cut poinsettias will last up to two weeks if, immediately after cutting, you first dip the cut ends into hot water at around 60°C for a few seconds, then into cold water and finally place them in fresh, cold water.
Homemade retro Advent arrangement with potted poinsettias

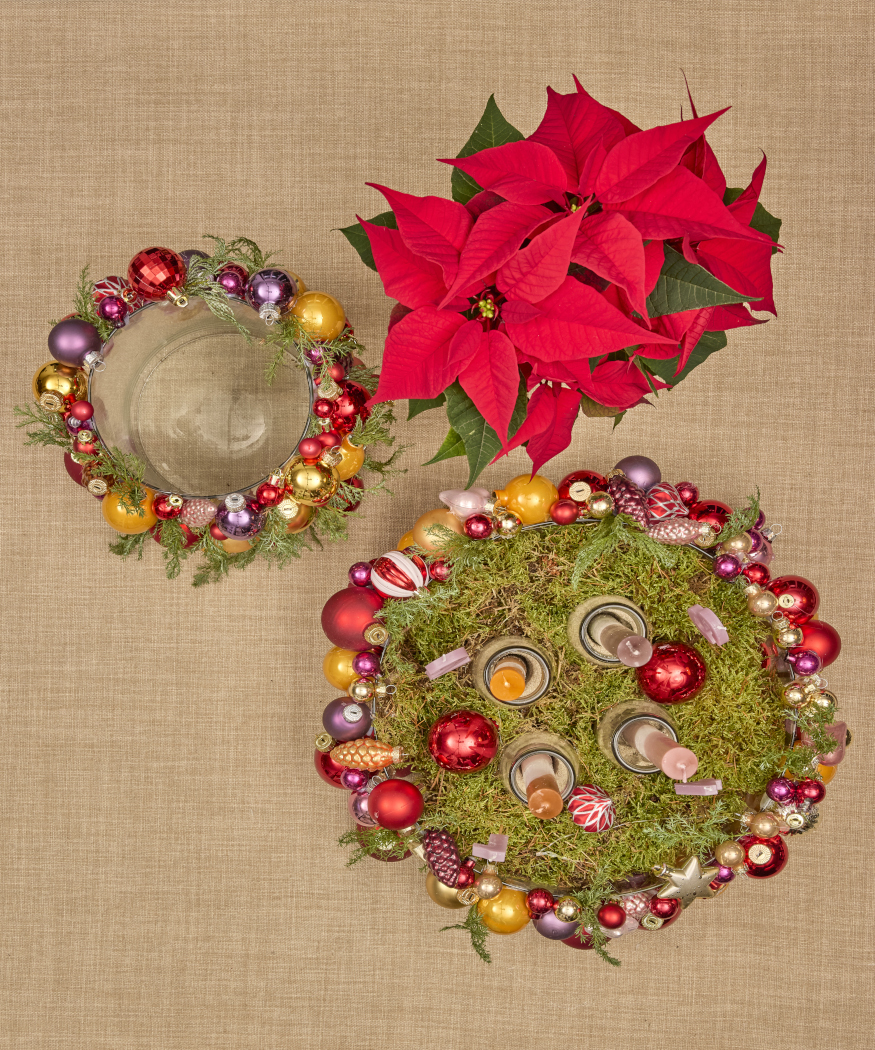
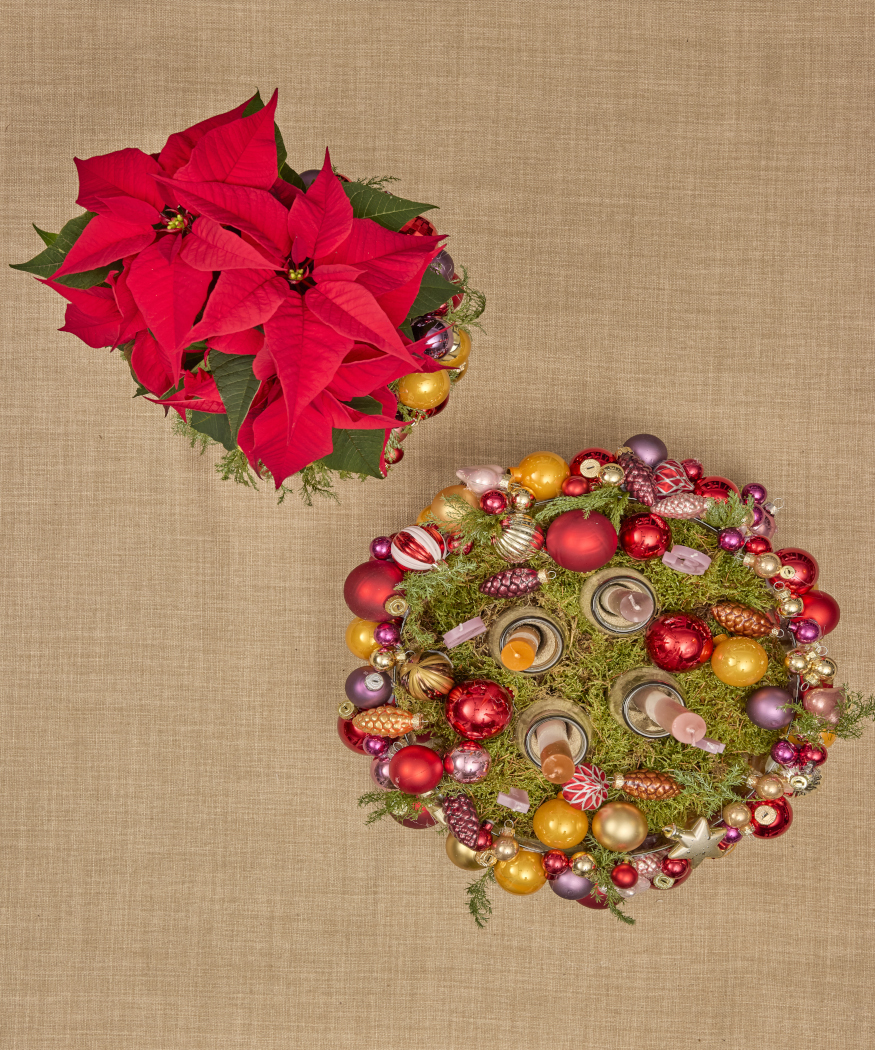
In this opulent Advent display on the left, the magnificent wreath and lavishly decorated pot for the bright red poinsettia form a harmonious whole. Both are richly embellished with shiny, colourful baubles, moss and juniper sprigs, creating a festive feature.
In the centre of the wreath are four pillar candles in jars filled with sand. Two red mini poinsettias in gold pots complete the festive look.
To recreate this craft project you will need: a red poinsettia plant; a shallow glass bowl; a cylindrical glass vase; four ombre or dip dyed candles in warm colours; four small, wide-necked glass bottles to hold the candles; colourful baubles (matt and glossy) in various sizes; other decorations such as cones; juniper stems; preserved moss; fine sand; a hot-glue gun and glue sticks, secateurs; four number candles on sticks, numbered 1 to 4.
Here’s how to make it:
Step 1: Use the hot glue gun to stick the baubles and other decorations to the cylindrical glass vase. Start at the bottom and work your way up. Allow the glued items to cool in between. This will create a festive planter to show off the poinsettia and give it a glamorous look. Do the same with the glass bowl.
Step 2: Fill the four small glass bottles about half full with sand.
Step 3: Push the four pillar candles into the sand. This will give the candles stability and ensure they stand securely.
Step 4: Place the four small bottles and candles in the glass bowl and stabilise with more sand. Then cover the gaps and the entire top of the bowl with moss. This creates a natural transition between the candles and the festive wreath.


Step 5: Use the secateurs to cut the juniper stems into small sprigs and place them around the wreath between the baubles. The fresh green contrasts well with the shiny baubles and gives the arrangement a natural touch.
Step 6: Push the number candles into the moss.
Step 7: Finally, place more baubles and decorations loosely on top of the moss. This adds a festive touch and completes the look of the wreath.
Advent decoration with mini poinsettias

This unusual Advent arrangement on the left is based on a hanging metal ring suspended from a rope.
The centrepiece is a glass bowl filled with bright red mini poinsettias.
All around, classic Christmas decorations, pine cones and juniper, winterberry and pine sprigs decorate the hanging wreath and give it a natural touch.
This suspended design makes an unusual statement and blends tradition and lightness.
Two long wooden boxes filled with moss and mini poinsettias form the basis of this special homemade Advent calendar. The 24 numbered paper Christmas trees in white, silver-grey and warm beige are lined up on thin wooden sticks and conjure up a wintry forest scene. Behind each tree is a rolled-up message with a personalised Christmas greeting.
You will need two long wooden boxes lined with plastic, about ten mini poinsettias in soft shades of pink, cream and apricot, moss, 24 thin wooden sticks, kraft paper in white, silver-grey and beige, a template for the paper Christmas trees, a pencil, scissors, a white marker, twine, a hot glue gun and glue sticks and paper for the personal messages.
Here’s how it’s done:
Step 1: First, make a template for the paper Christmas trees. Draw the shape of a tree on white card or stiff paper and cut it out. Alternatively, you can print out an online template and transfer it. Place the template on the kraft paper (white, silver-grey and beige) and trace round it with a pencil.

Step 2: Cut out the Christmas trees with scissors. You will need 24 in total – eight of each colour.
Step 3: Using the white marker or a fine white felt tip pen, write the numbers 1 to 24 on the paper trees you’ve cut out. Alternatively, use number stickers or adhesive labels.
Step 4: Attach the labelled trees to the wooden sticks the hot glue gun. Apply a dab of hot glue to the back of each tree at the bottom. Leave about 5cm of stick above the glue to make room for the paper rolls in the next step. Gently press the stick down until the glue has cooled.


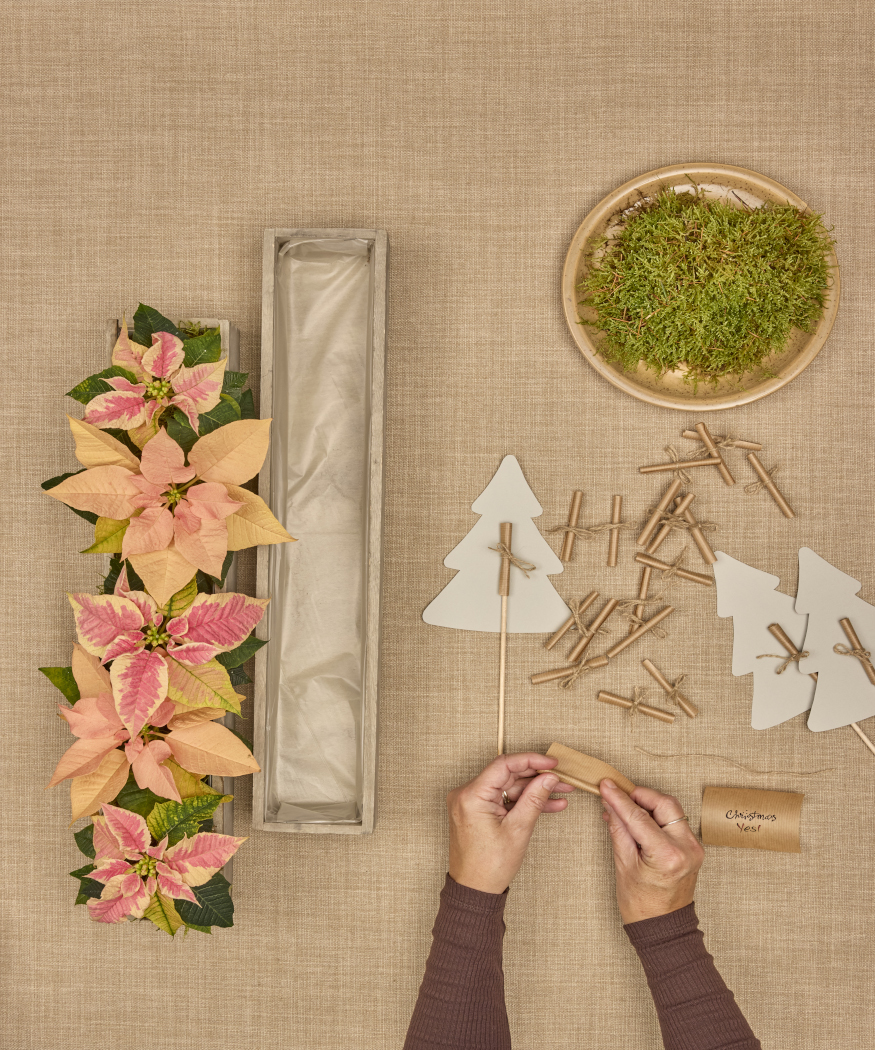


Step 5: Write a short Christmas greeting or message on thin paper for each of the 24 trees. Then carefully roll up each paper and attach it to each wooden stick with a twine bow.
Step 6: Keeping them in their pots, place the mini poinsettias next to each other in the long wooden boxes. Carefully fill in the gaps with moss. The moss not only adds an atmospheric touch but also holds the pots in place.
Step 7: Add the finished trees on sticks to the wooden boxes filled with mini poinsettias and moss. Arrange them at different heights to create a three-dimensional forest scene.
Homemade poinsettia Christmas tree
A Christmas tree with a difference: this unusual home assembly tree is all about poinsettias. A wooden structure forms the base for numerous woven wood baskets filled with beautiful poinsettias in warm cream, apricot and pink tones.


The tiered arrangement of the plants gives the tree a voluminous silhouette. Beneath it are gifts wrapped in plain paper and decorated with bows, twigs and cut poinsettias – a pleasing combination of natural beauty and festive elegance.