English
 Dansk
Dansk Deutsch
 English
 Español
 Français
 Hrvatski
 Italiano
 Magyar
 Nederlands
 Norsk
Norsk Polski
 Română
 Slovenský
 Slovenščina
 Suomi
Suomi Svenska
 Čeština
 Ελληνική
 Български
Poinsettias are usually arranged in classic displays on windowsills, sideboards or tables. This creates a cosy atmosphere and gives rooms a festive feel in winter. However, these popular seasonal plants look even more impressive when displayed in surprising and creative ways. Whether placed on homemade plant stands, used as natural centrepieces in moss and wire containers, or as delicate cut decorations in glass tubes on repurposed picture frames, simple craft ideas can create decorative focal points full of character. The experts at Stars for Europe (SfE) reveal how to create unique pieces in just a few steps.
Upcycled poinsettia plant stands
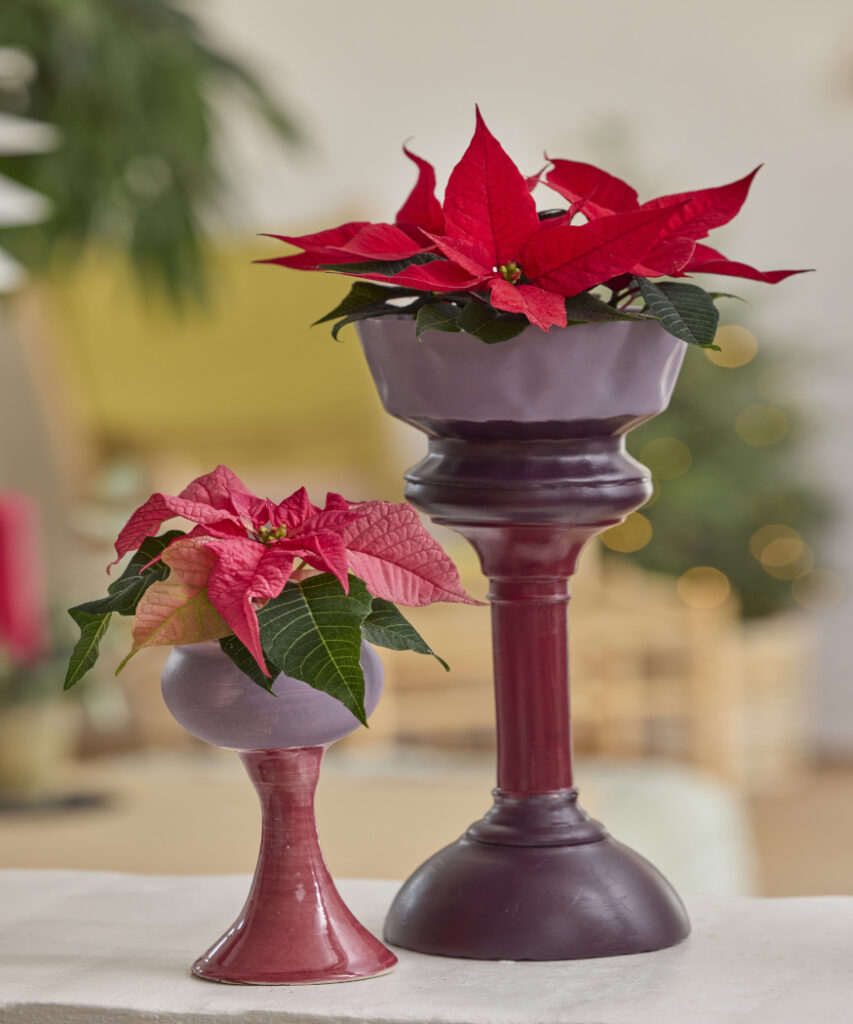
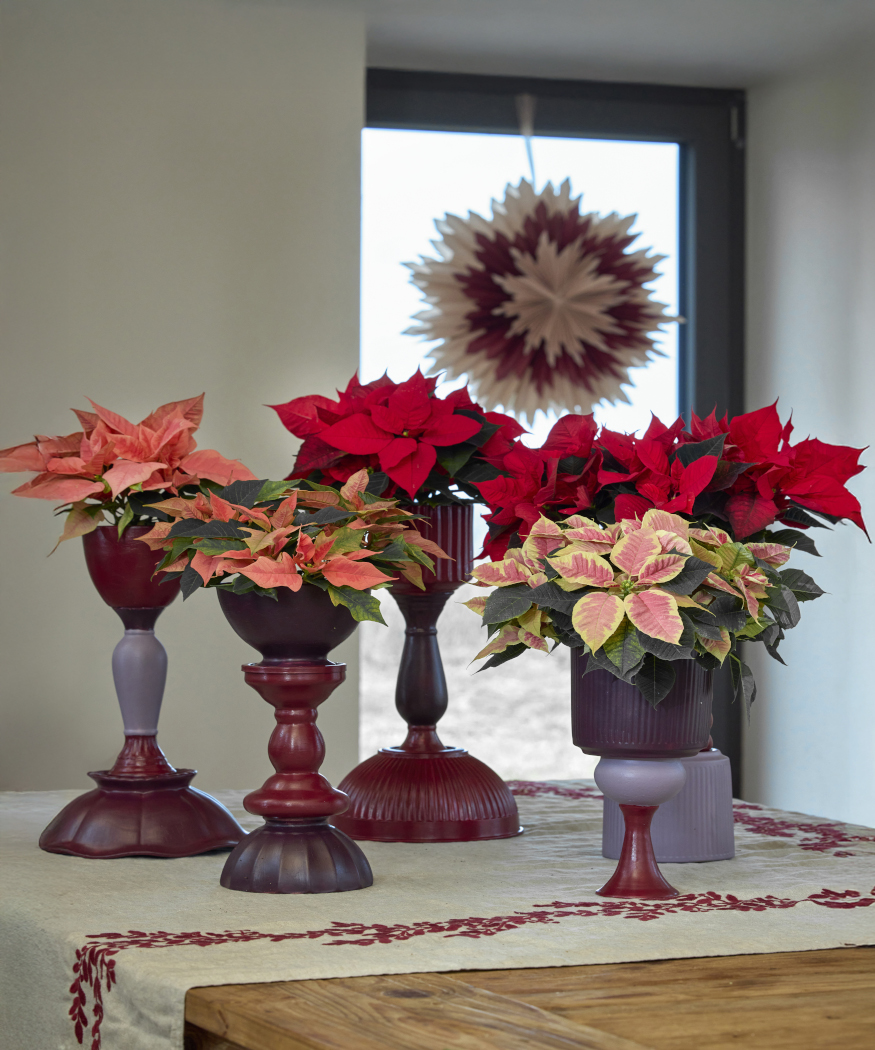
Unwanted glass or ceramic objects, such as vases, bowls or candlesticks, can be transformed into stylish homemade plant stands in coordinating berry tones using just paint and hot glue. Arranged at various heights, these are great way to show off poinsettias. The varying hues of these plants add vibrancy to the display, making it a real festive showstopper.
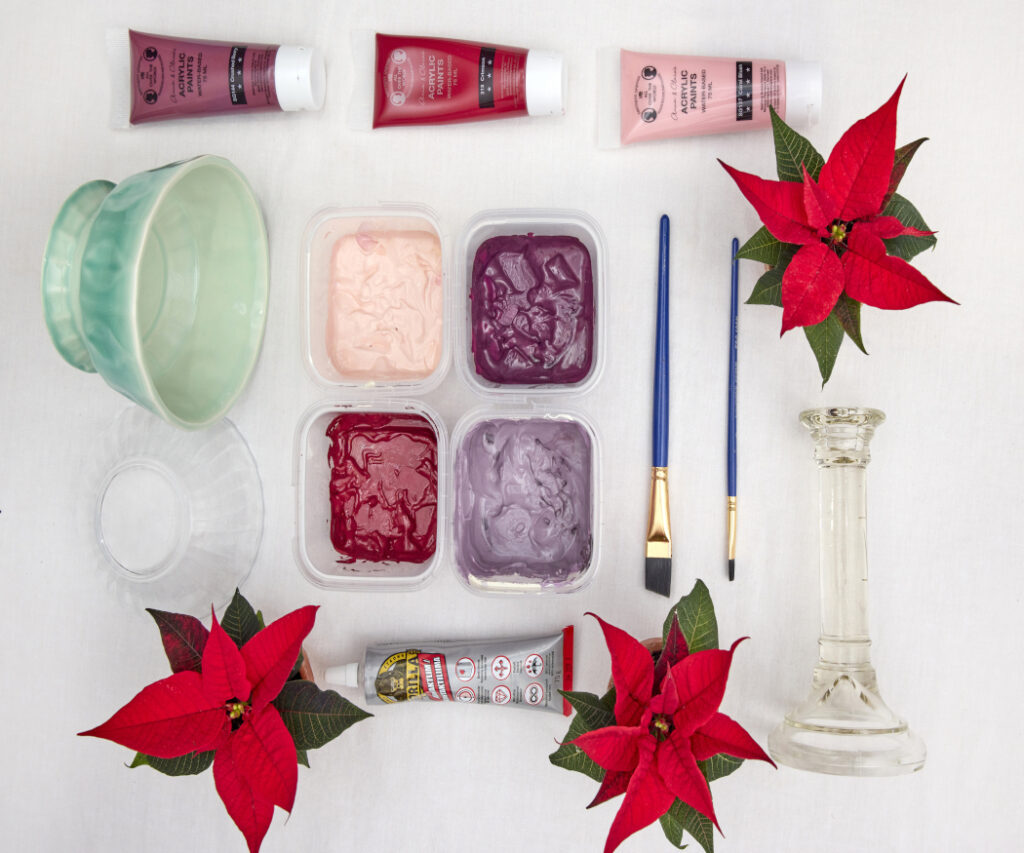
To complete this creative upcycling project, you will need old glass or ceramic items such as bowls, vases or candlesticks. The top piece must be suitable for use as a planter so a poinsettia can be added later. You will also need acrylic paints and brushes, a universal glass and ceramic adhesive, and poinsettias in complementary colours.
Here’s how to do it:
Step 1: First, thoroughly clean the glass or ceramic objects and leave them to dry. Then, stack the pieces to decide on the shape and height of the plant stand. Next, fix the pieces in place with the glue. Leave to set.
Step 2: Paint your plant stands with the acrylic paints in berry tones, as desired. Tip: Mixing lighter or darker colours allows you to create different shades.
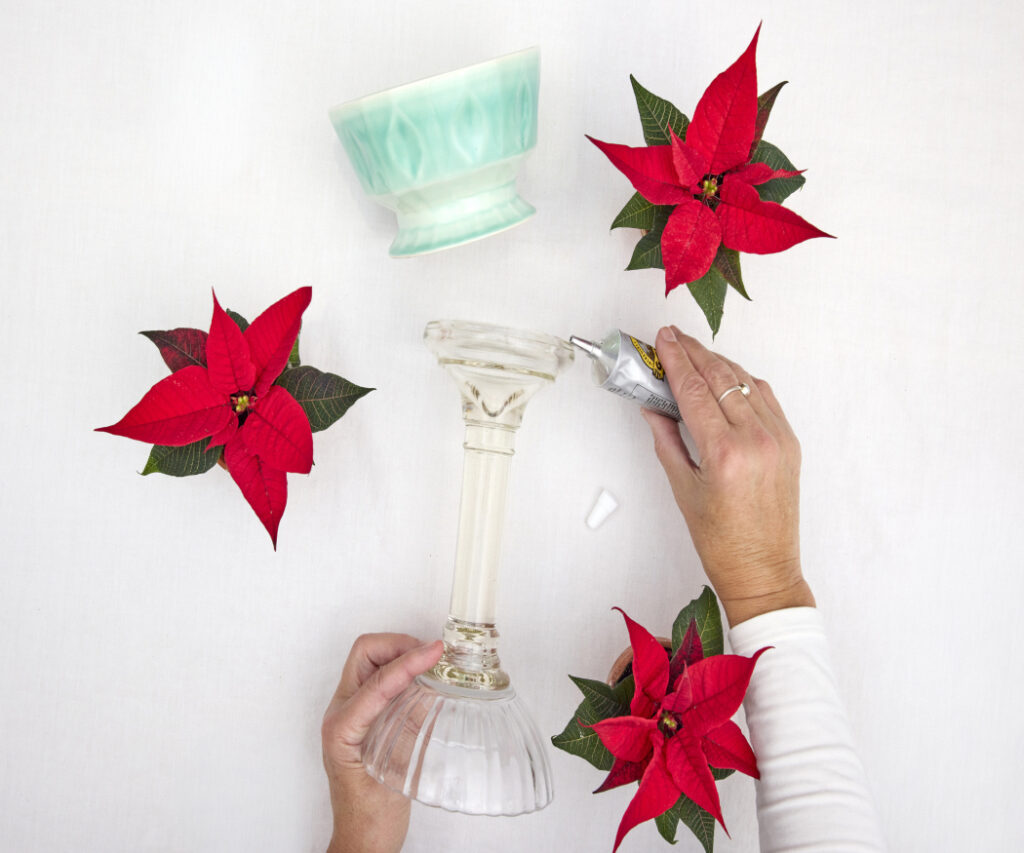
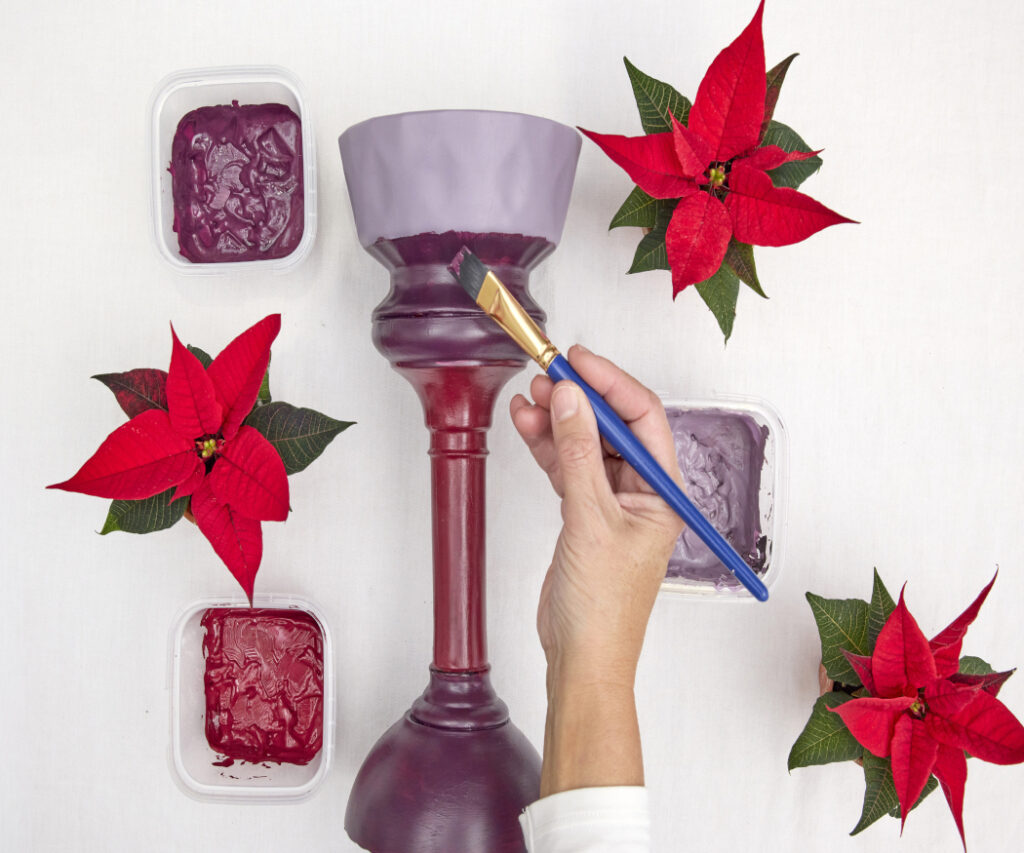
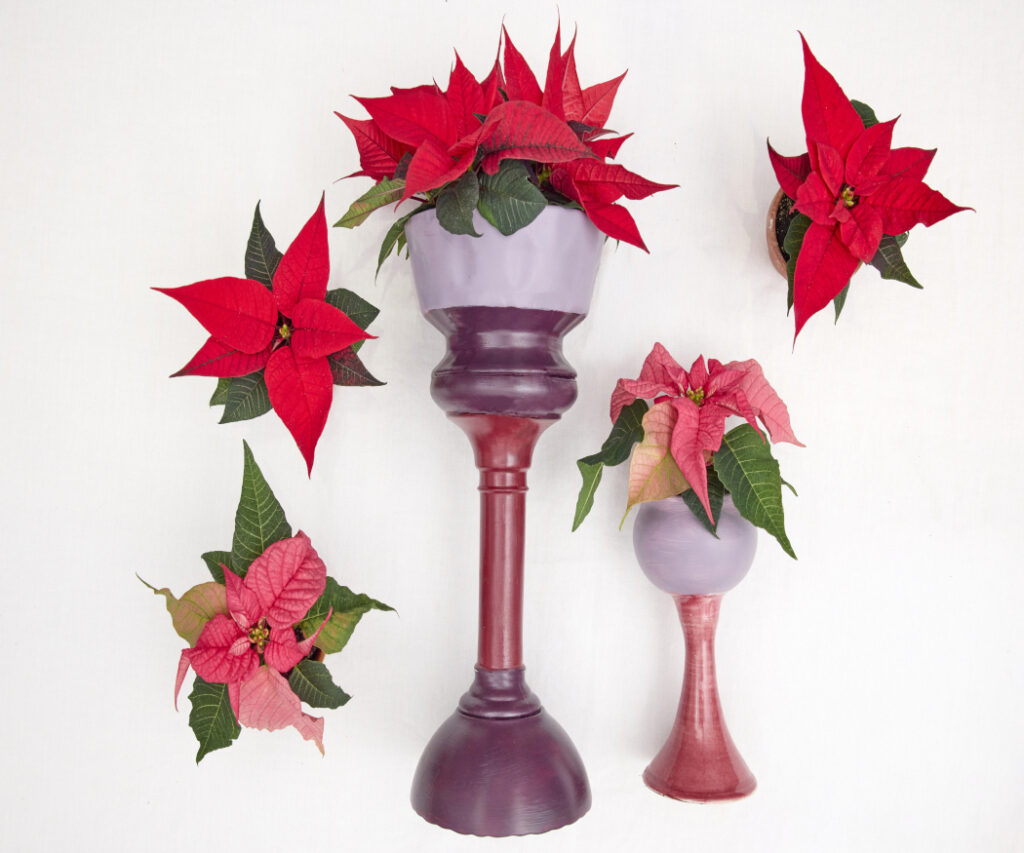
Step 3: Finally, place a poinsettia in the top container. To make sure you enjoy your plant for as long as possible, don’t overwater it and site your plant stand in a bright spot.
Naturally decorated: Poinsettia in a wire container
This craft idea transforms a poinsettia with variegated pink and white bracts into a vibrant centrepiece. Nestled in a wire container adorned with fir branches and moss, it makes an atmospheric winter-themed table decoration. You can easily recreate this arrangement step by step.
You will need a potted poinsettia in your preferred colour, evergreen branches, e.g. Nordmann fir (Abies nordmanniana) or pine (Pinus), dried moss, two glass containers of different sizes (the smaller one should be large enough to hold the poinsettia), chicken wire, binding wire, string and a decorative star. You will also need wirecutters and secateurs.
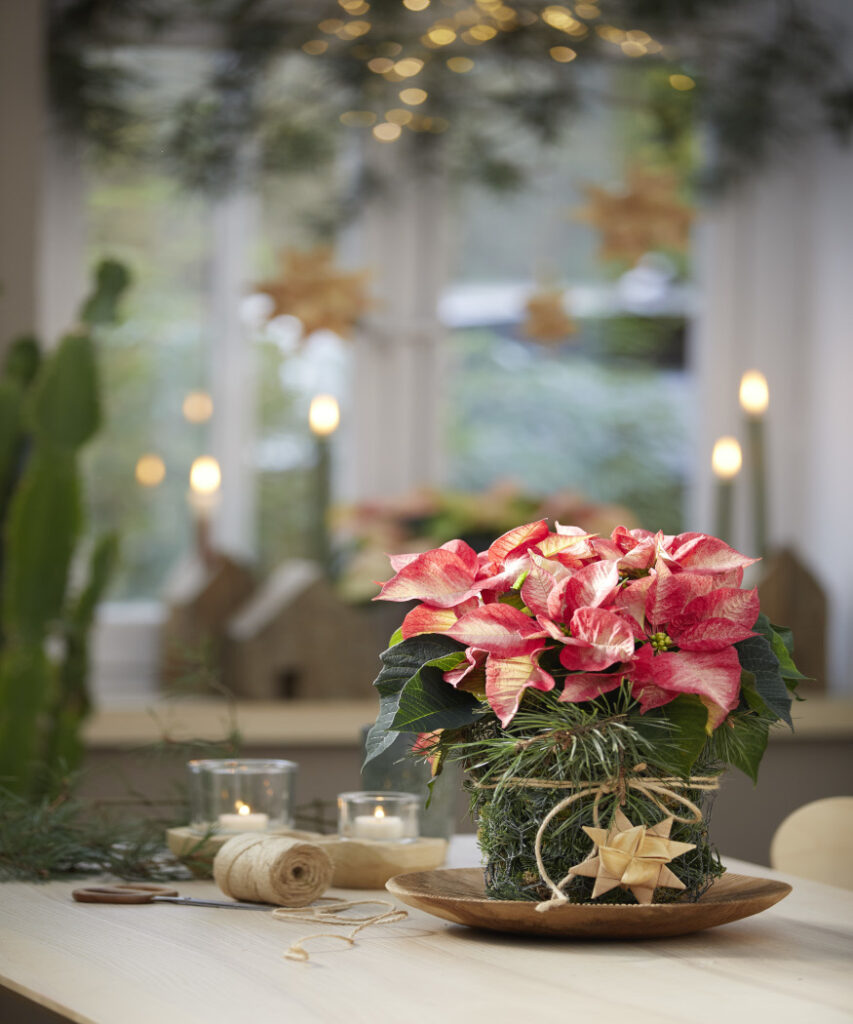
Here’s how to do it:
Step 1: Use wirecutters or secateurs to cut a length of chicken wire long enough wrap loosely round the larger glass container, once folded in half. Use the height and circumference of the container as a guide.
Step 2: Fold the cut piece of wire in half.
Step 3: Wrap the folded wire around the larger glass container, ensuring it covers the sides and base. Shape the wire with your hands until you have a smooth, basket-like form.
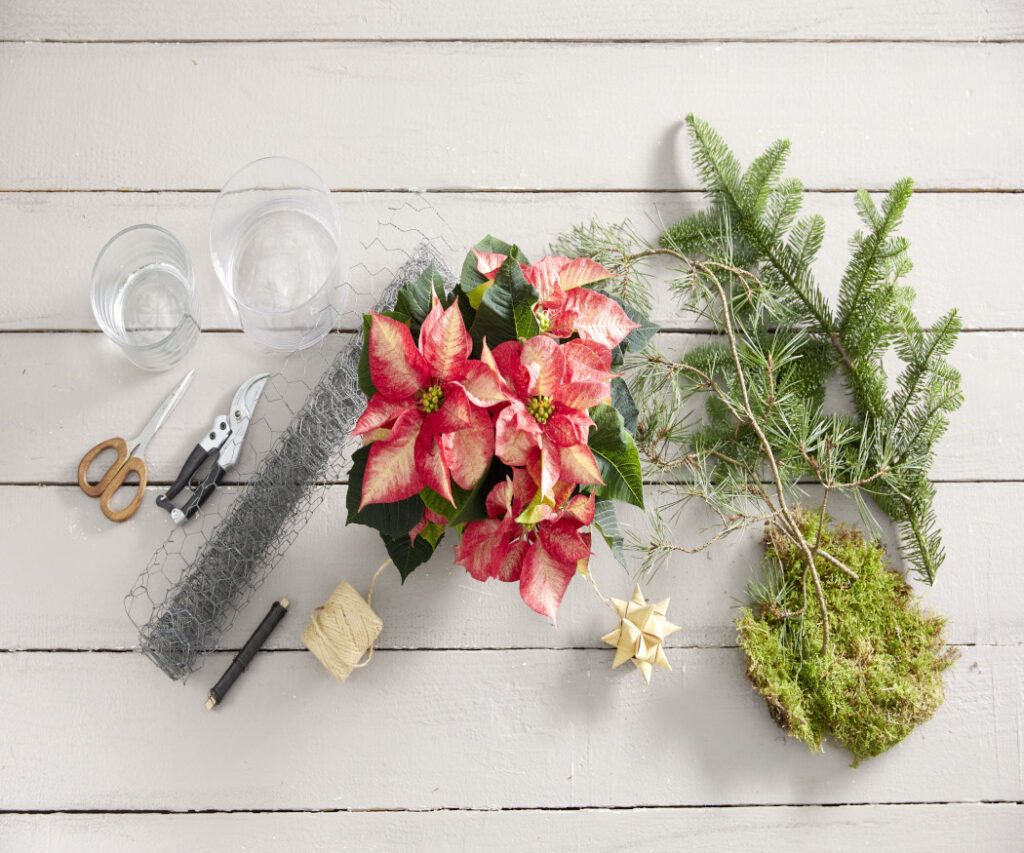
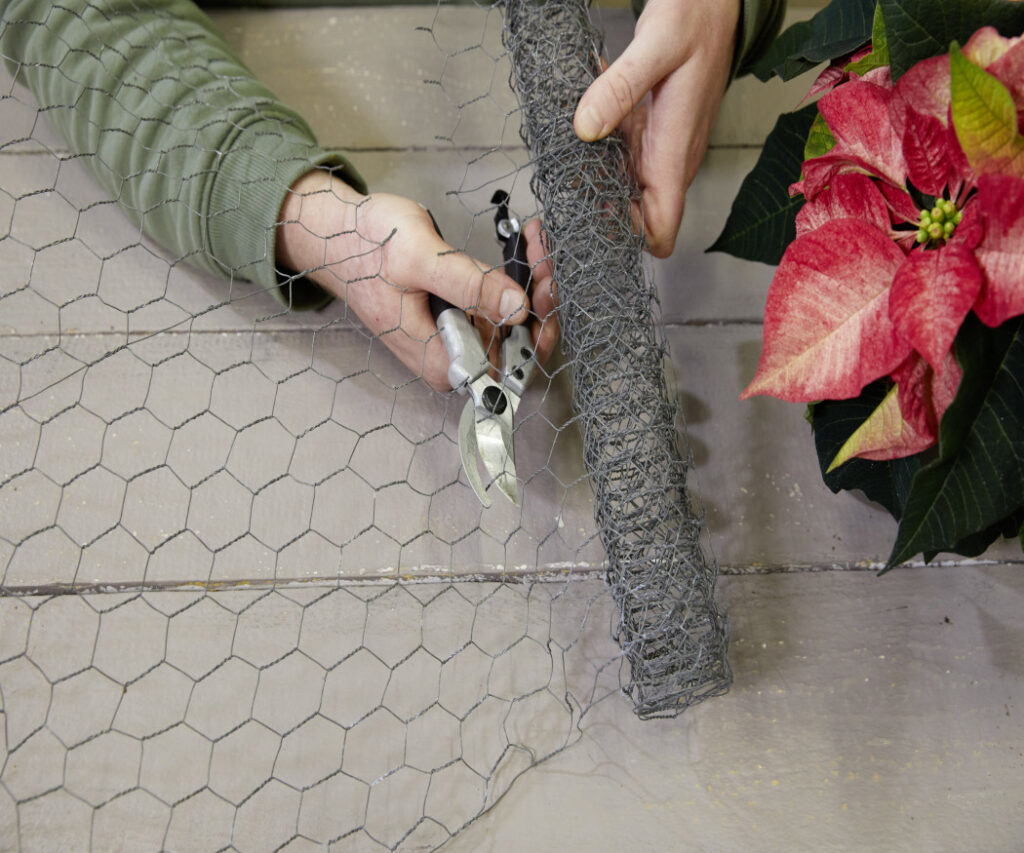
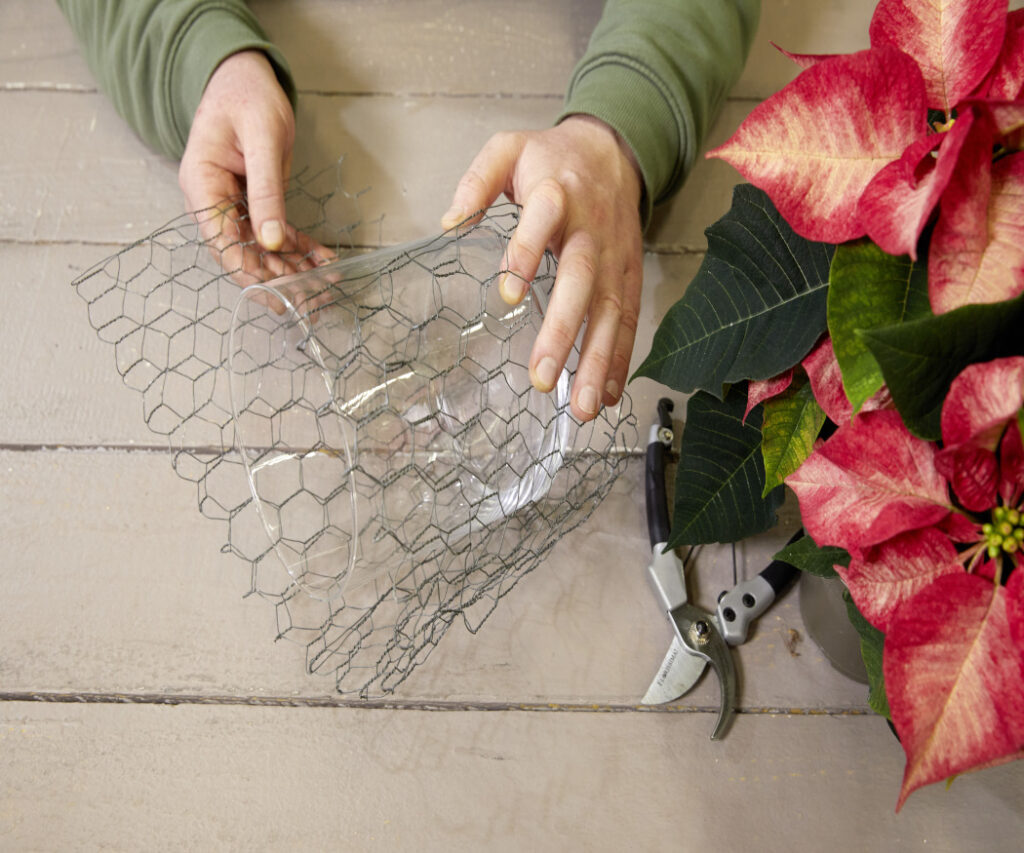
Step 4: Bring the wire ends together at the base of the container and secure them in place with the binding wire. This will give the basket stability and help it retain its shape.
Step 5: Carefully remove the larger glass container from the wire frame and place the smaller one in the centre. Loosely fill the space in between with the evergreen branches and moss until you have a smooth, natural-looking finish.
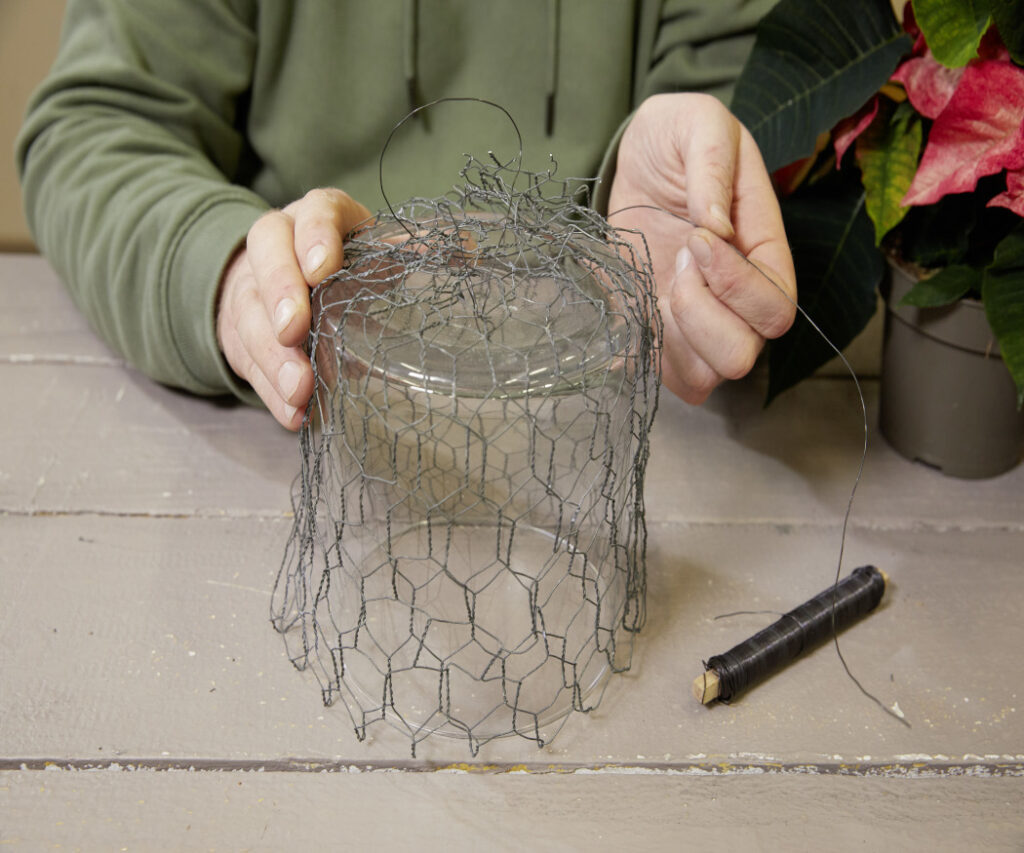
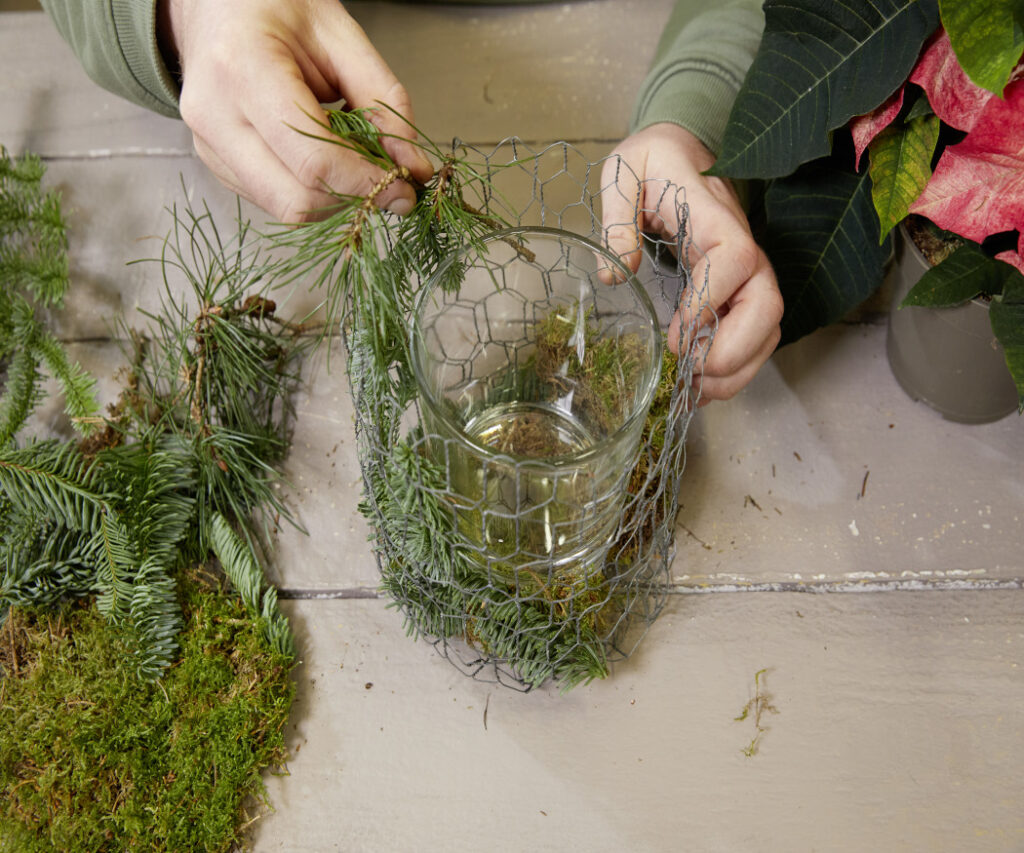
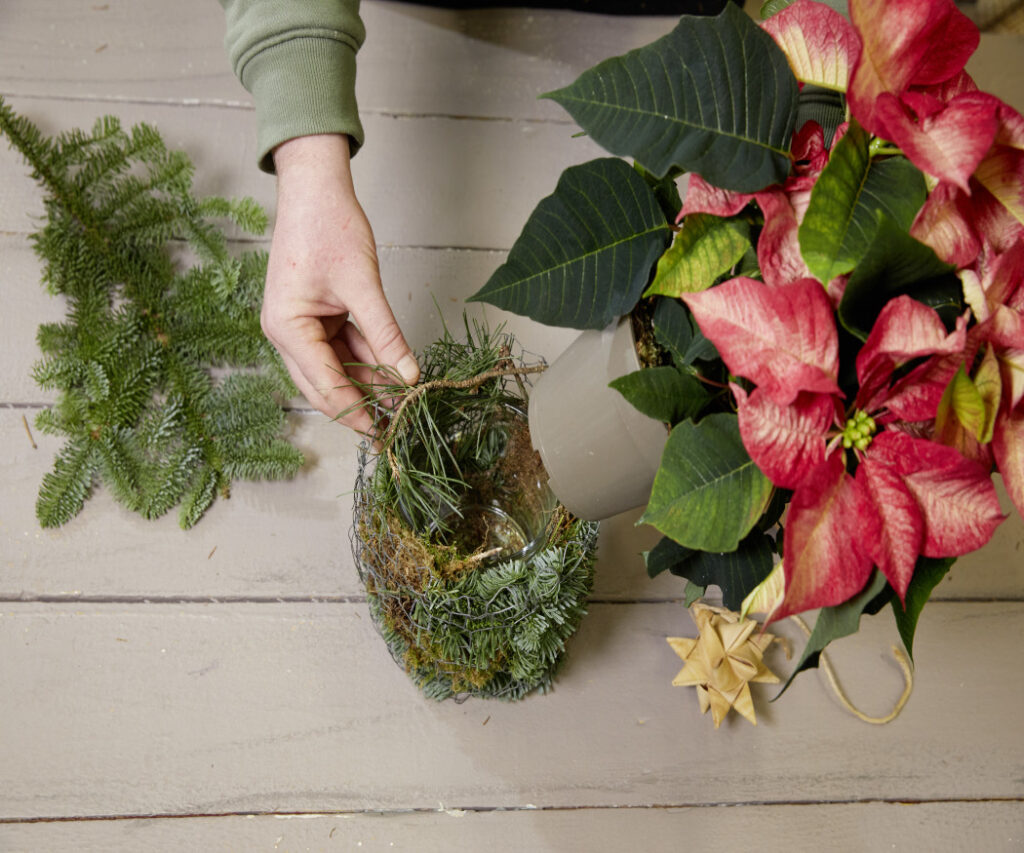
Step 6: Place the potted poinsettia inside the finished container. Finally, wrap your container decoratively with the string and finish off with the decorative star.
Tip: Only water when the soil feels dry to the touch to a depth of about 2cm. Remove any excess water after 15 minutes at the latest.
Vintage cut poinsettia picture frames
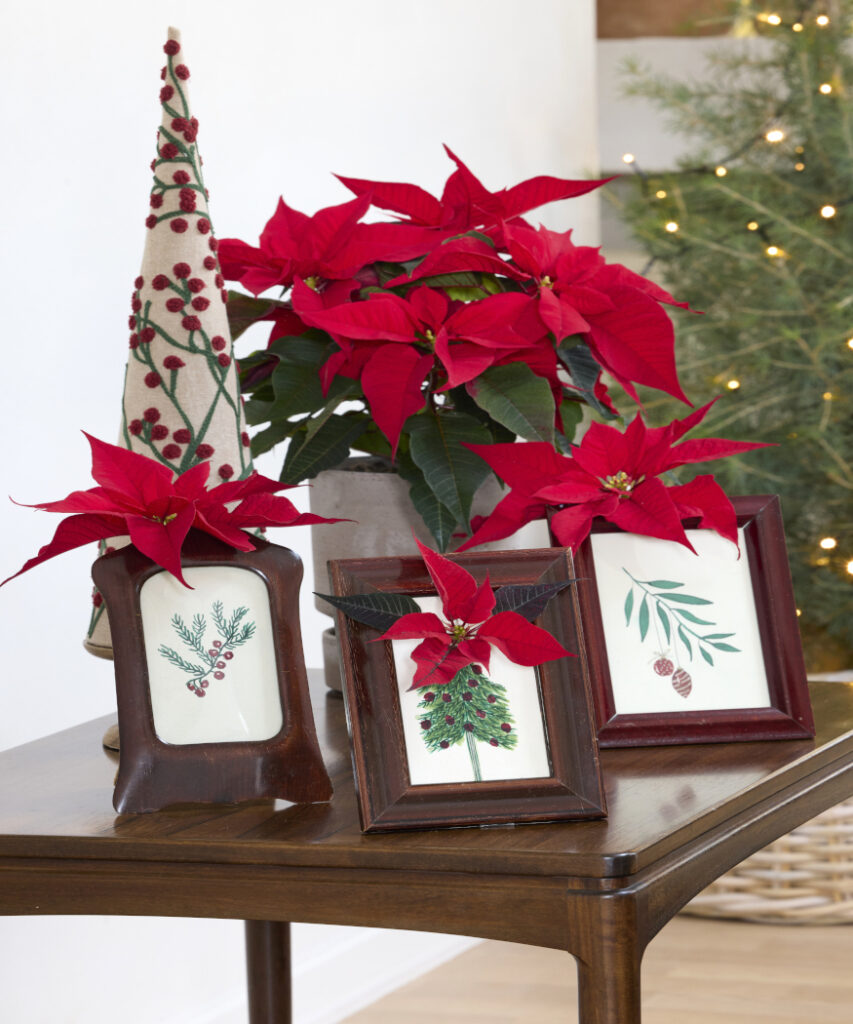
Transform old picture frames into decorative highlights by adding hand-drawn designs and vibrant poinsettias. This creative craft project is easy to recreate.
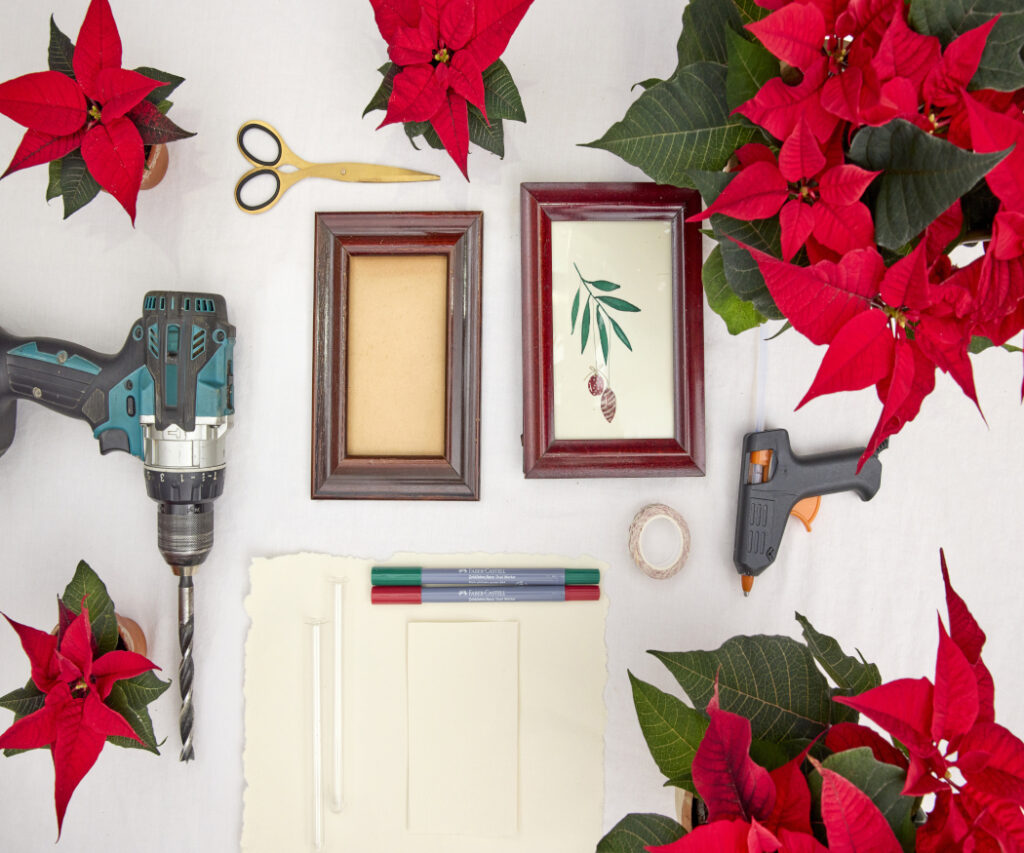
For this upcycling project, you will need paper, red and green pens for the drawings, scissors, old wooden picture frames, a drill, glass test tubes, tape, a hot glue gun and glue sticks, and a beautiful red poinsettia.
Here’s how to make it:
Step 1: Using the red and green pens, hand-draw Christmas images on the paper and insert them into the picture frames. For one of the frames, choose a Christmas tree image and position it so the tip of the tree is centred at the top of the frame.
Using hot glue, on the back of another frame, attach a test tube to one side with the opening facing upwards.
Step 2: Decide where to position the tip of the Christmas tree image, then carefully remove the picture and glass, and drill a hole at this precise spot from the front of the frame.
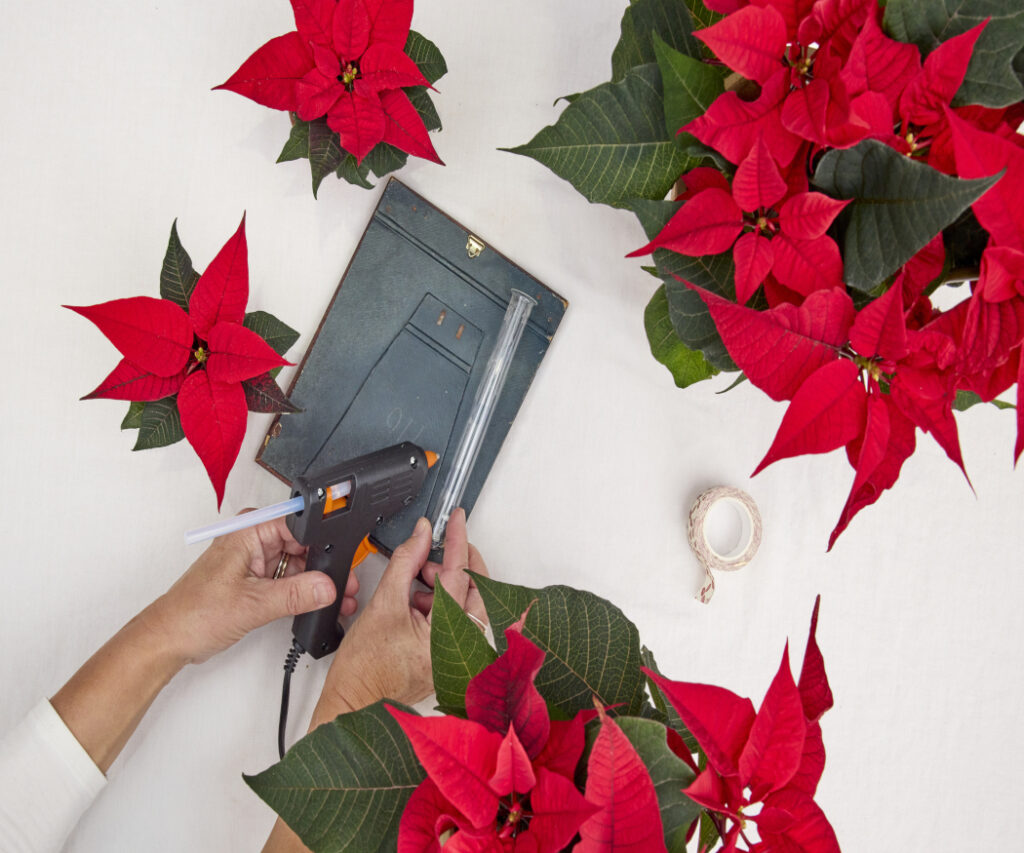
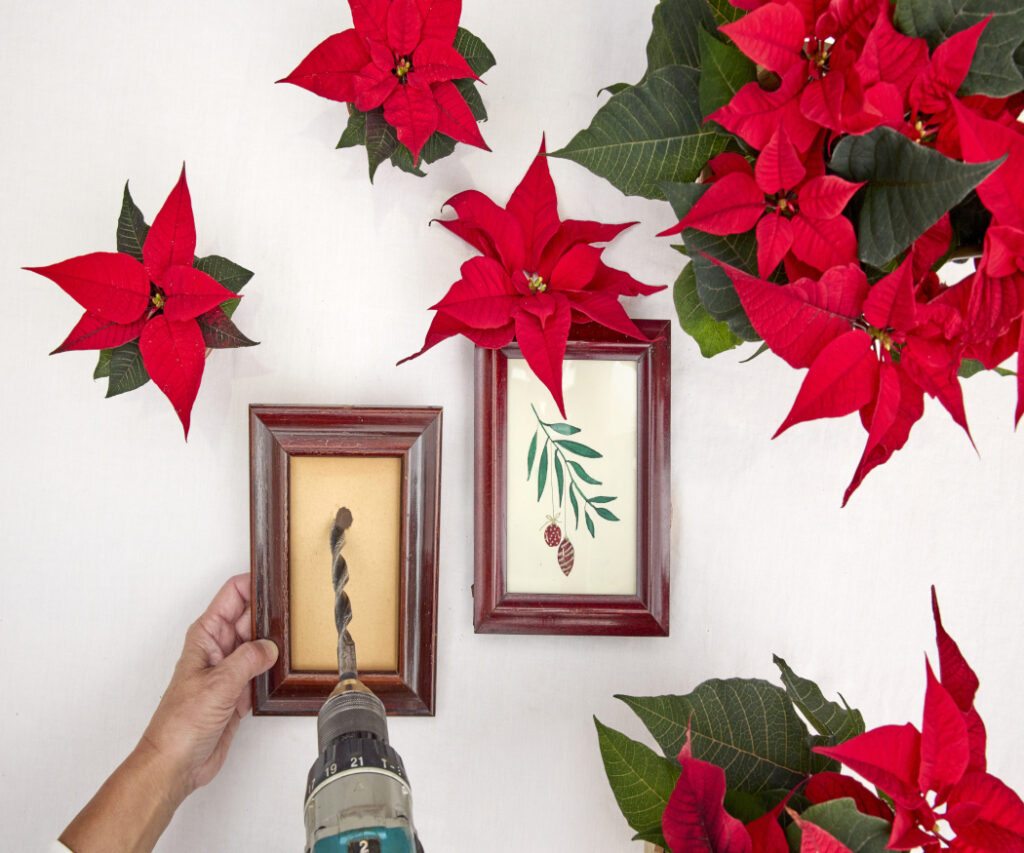
Step 3: Replace the image in the frame and cut a small opening in the paper over the hole. Insert the test tube diagonally through this opening from the front so no water can leak out. The opening should be positioned just above the tip of the Christmas tree.
Step 4: Attach a piece of tape to the bottom of the test tube.
Step 5: Secure the bottom end of the test tube to the underside of the picture frame with more tape. This creates a stand for the frame.
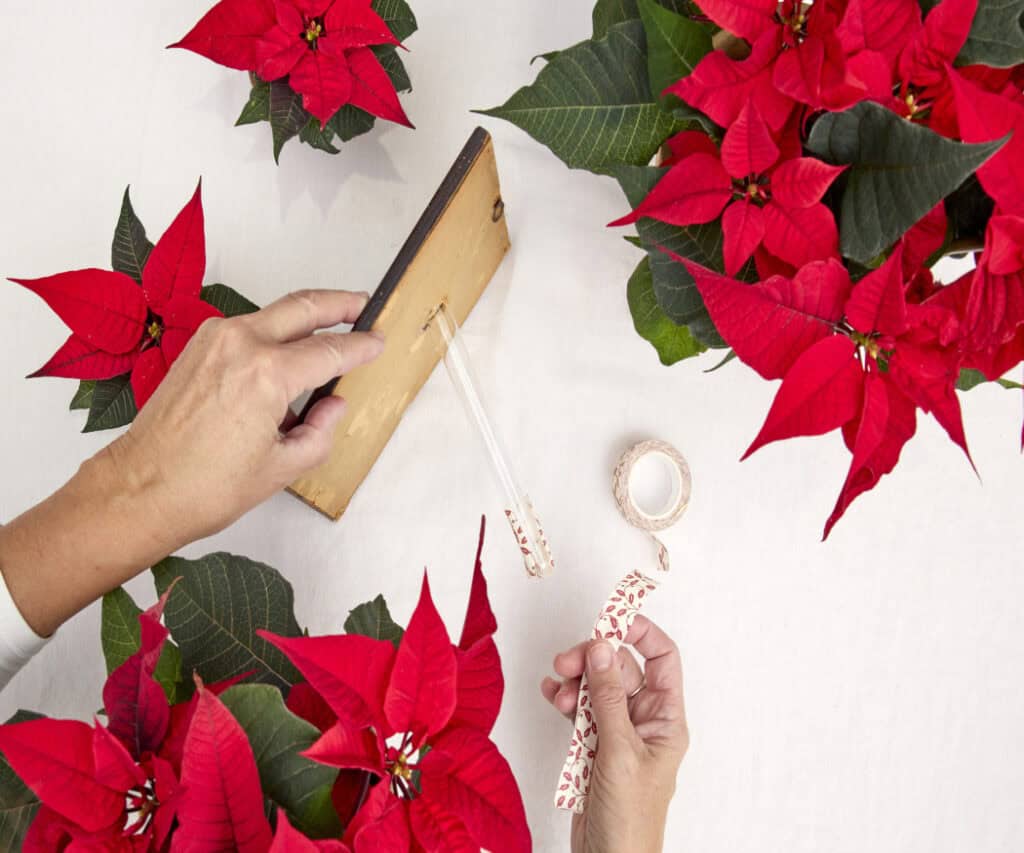
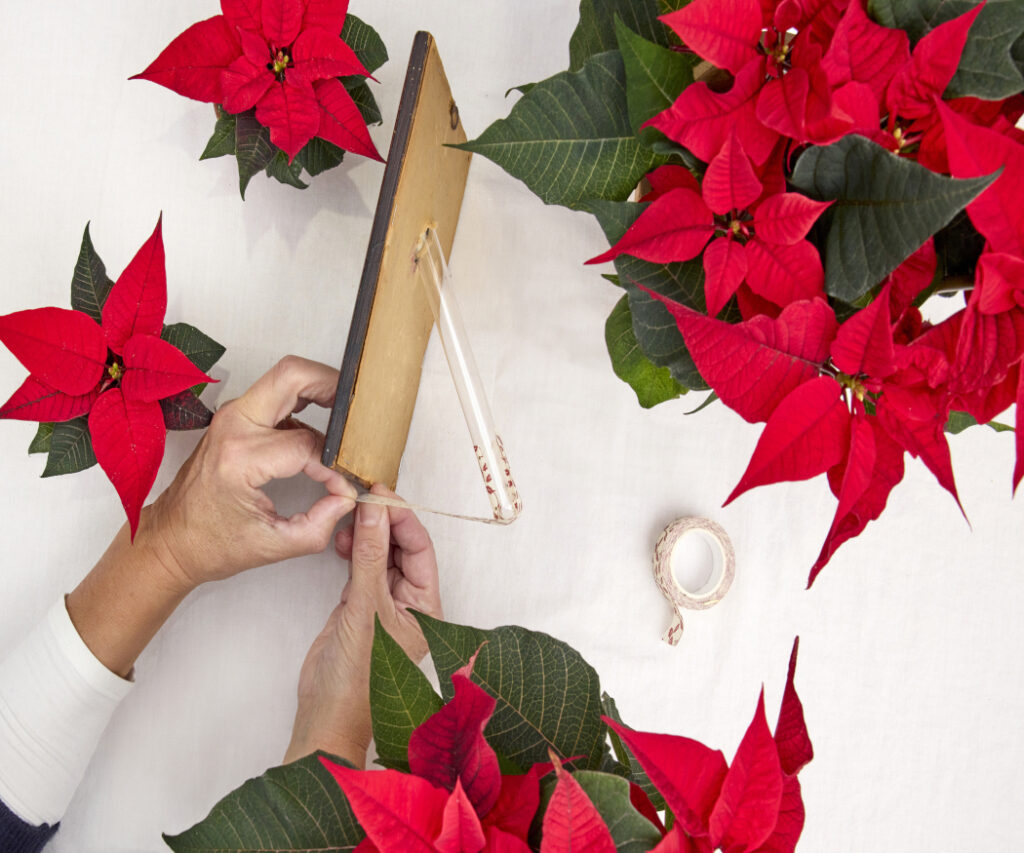
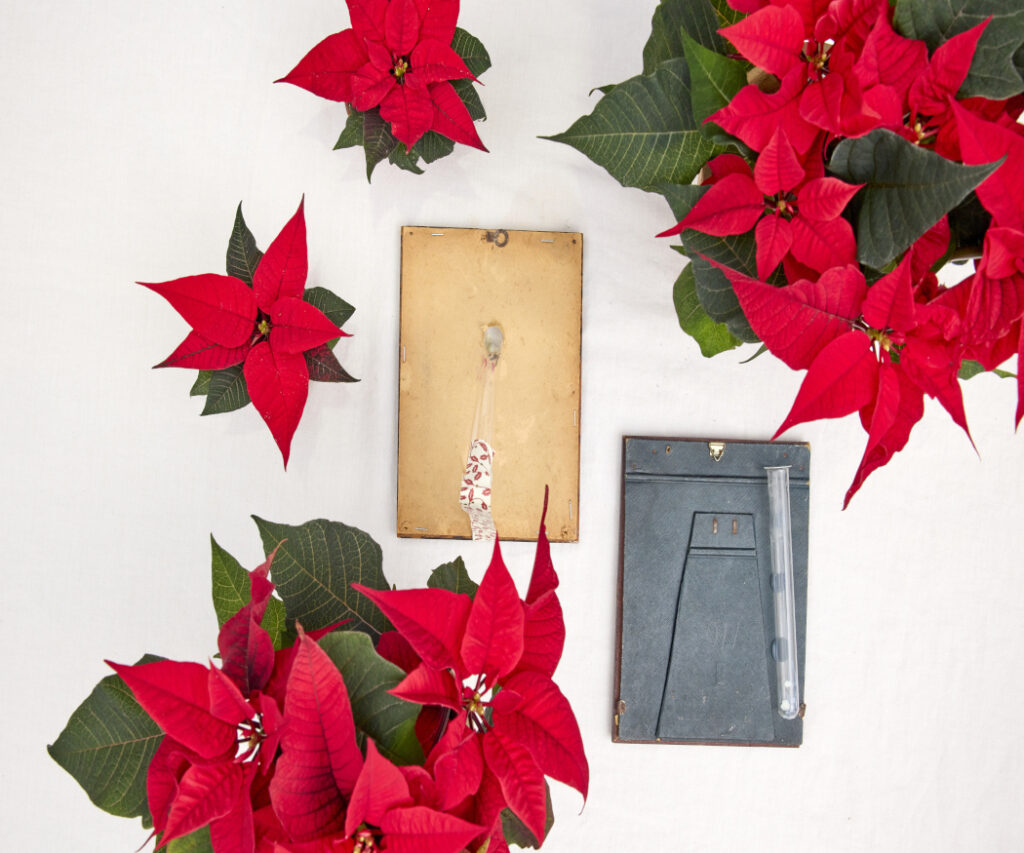
Step 6: Finally, fill the test tubes with water and place a cut poinsettia inside each one. Tip: Keep cut poinsettias fresh for up to two weeks this way; immediately after cutting, place the cut stems in hot water (around 60°C/140°F) for a few seconds, before putting them in cold water.
Miniature poinsettia landscapes
Create charming miniature Christmas landscapes in wooden or cardboard boxes with just a few simple steps. The possibilities are endless.
Depending on the colour of the poinsettia, this homemade decoration can be arranged in various ways: classically Christmassy with red poinsettias, twinkling lights and plenty of evergreen branches; as a snowy winter landscape with white varieties; or romantically playful with apricot versions. This is a creative craft project all the family can enjoy.
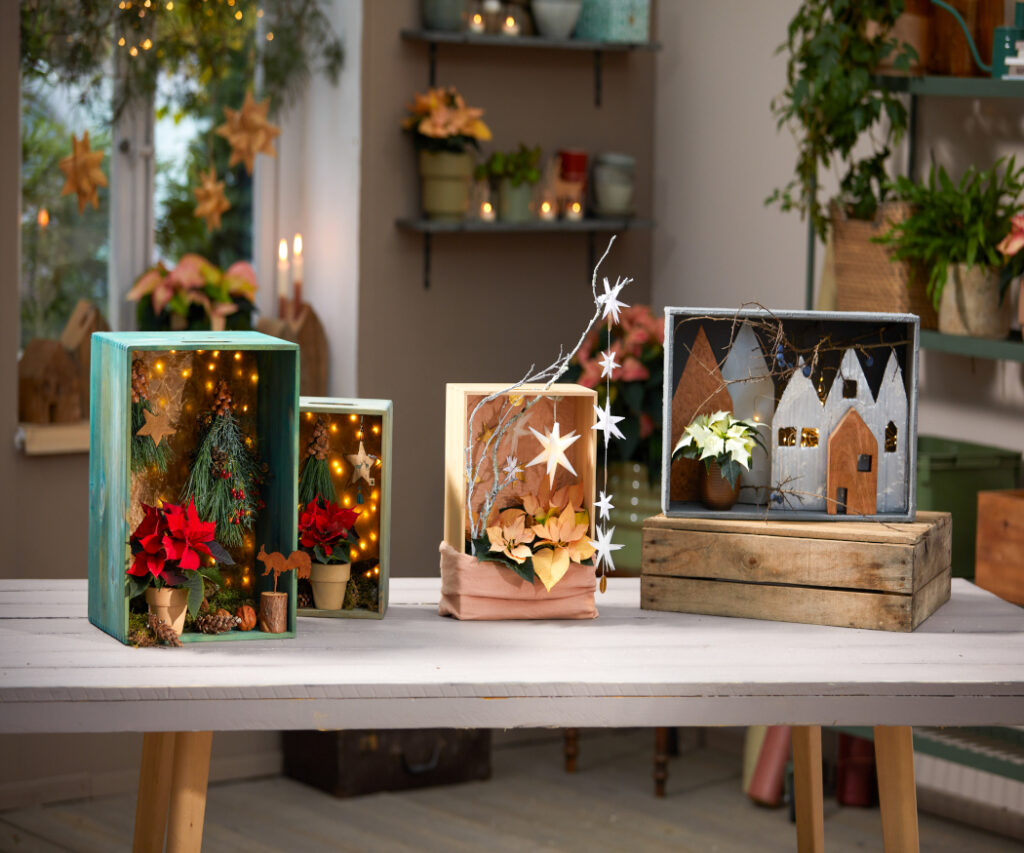
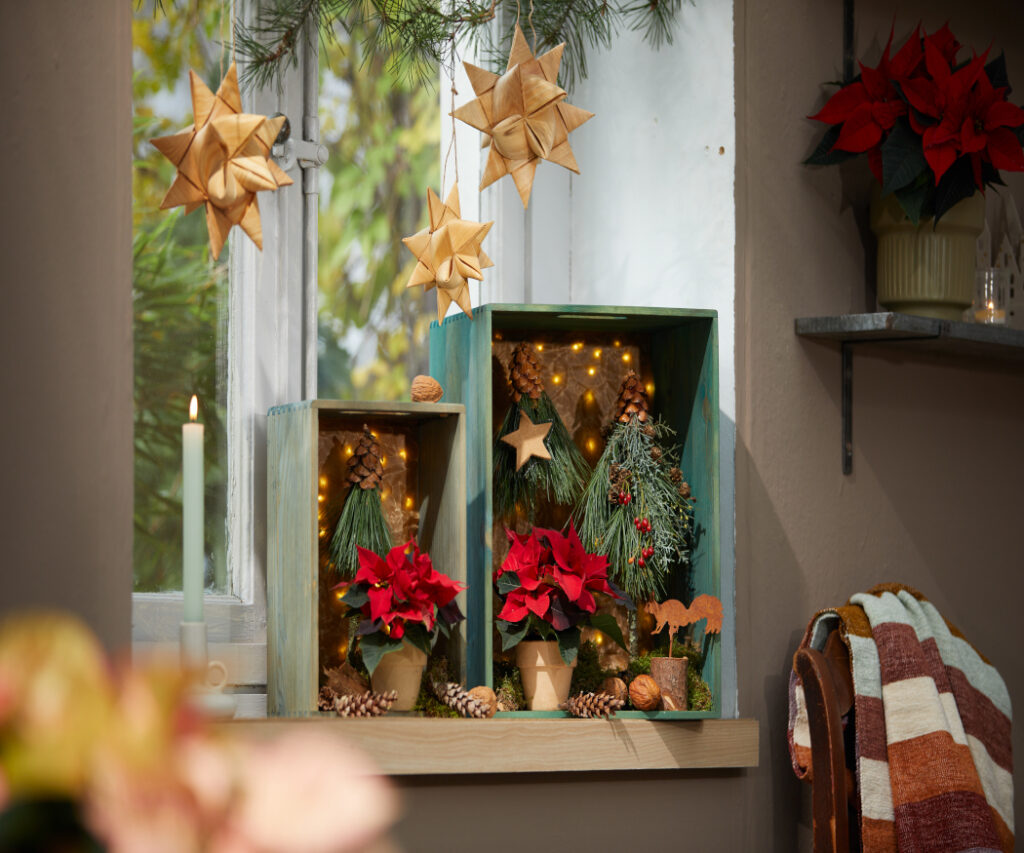
To create the winter scene on the left, you will need a wooden box, potted poinsettia, terracotta pot, pine and cypress foliage, larch cone stems, short twigs, dried moss, pine cones, rosehip stems and nuts.
You will also need a staple gun, string of battery-operated fairy lights, gold wax paper, hot glue gun & glue sticks, scissors, binding wire, clay, decorative star and a woodland animal figurine (optional).
Here’s how to make it:
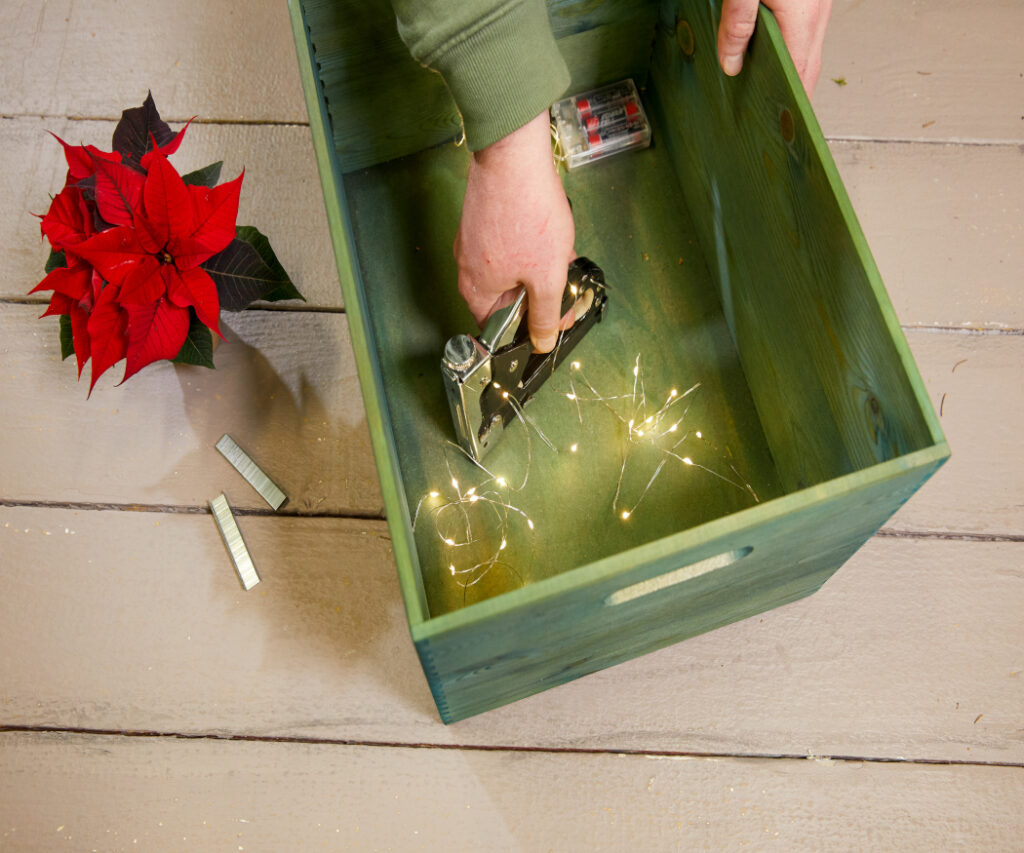
Step 1: Using the staple gun, loosely attach the fairy lights to the back of the wooden box, making sure they are evenly spaced across it.
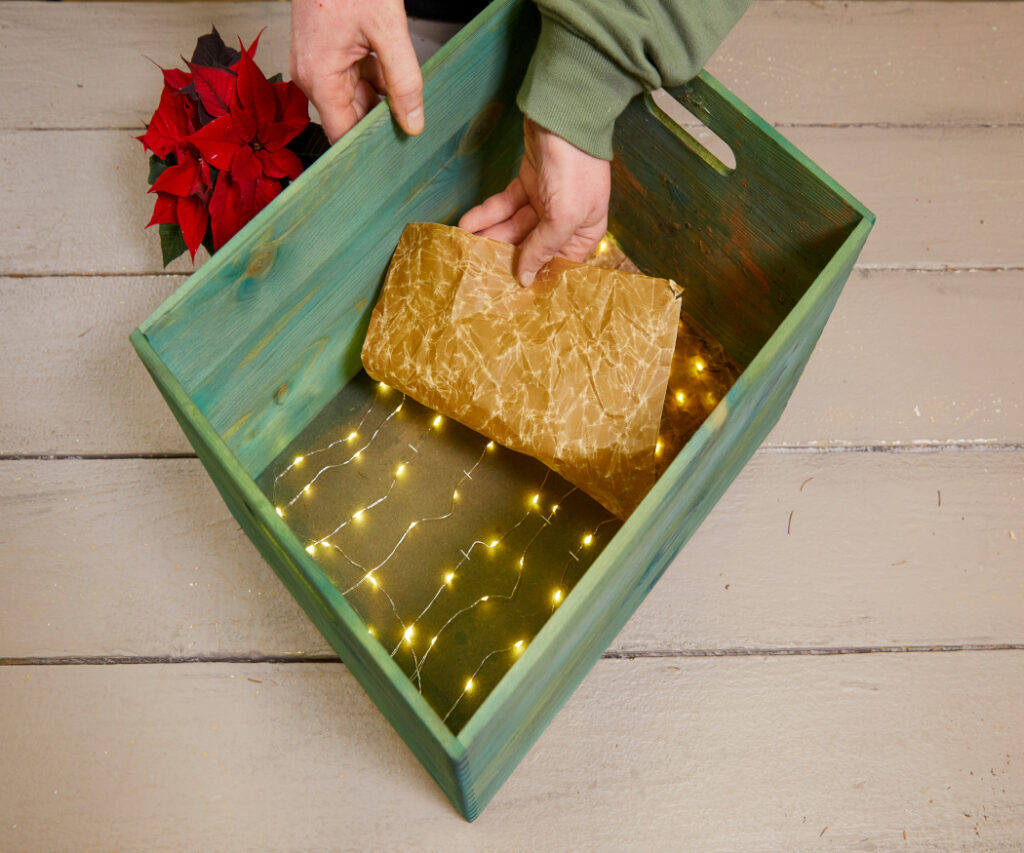
Step 2: Cut the gold wax paper to size. Crumple it lightly, then flatten it out again, to give it texture. Place it inside the box over the fairy lights as a background and secure it with hot glue.
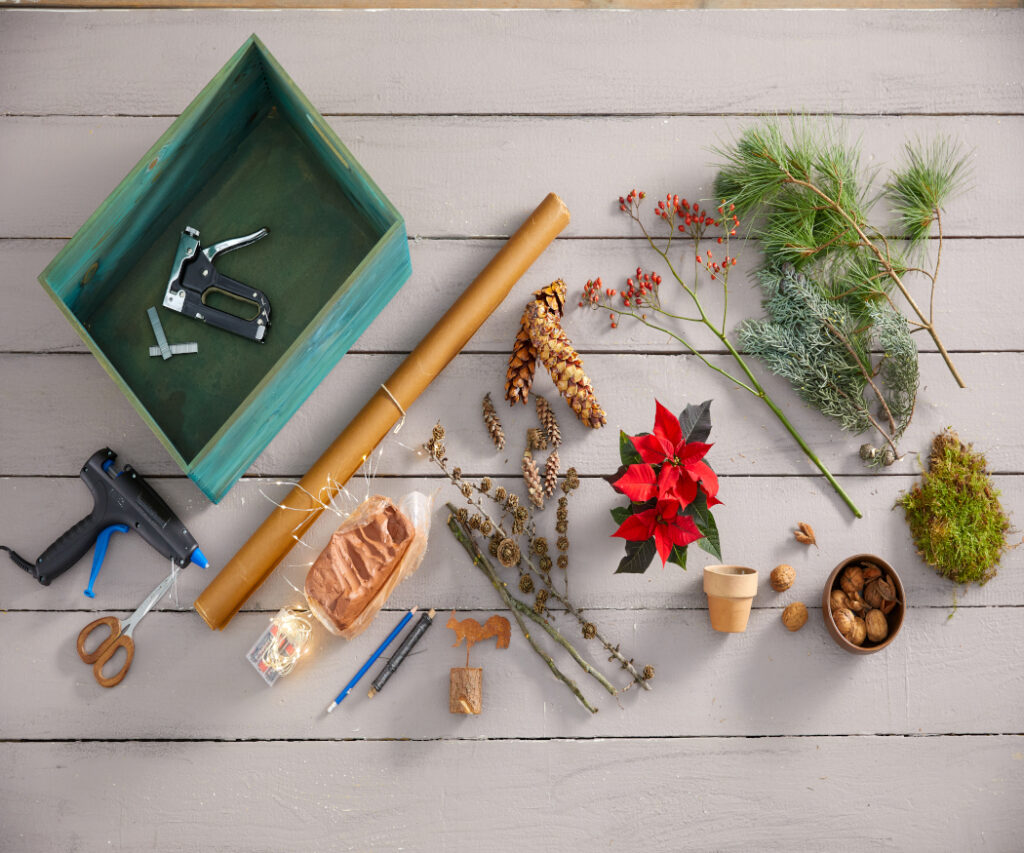
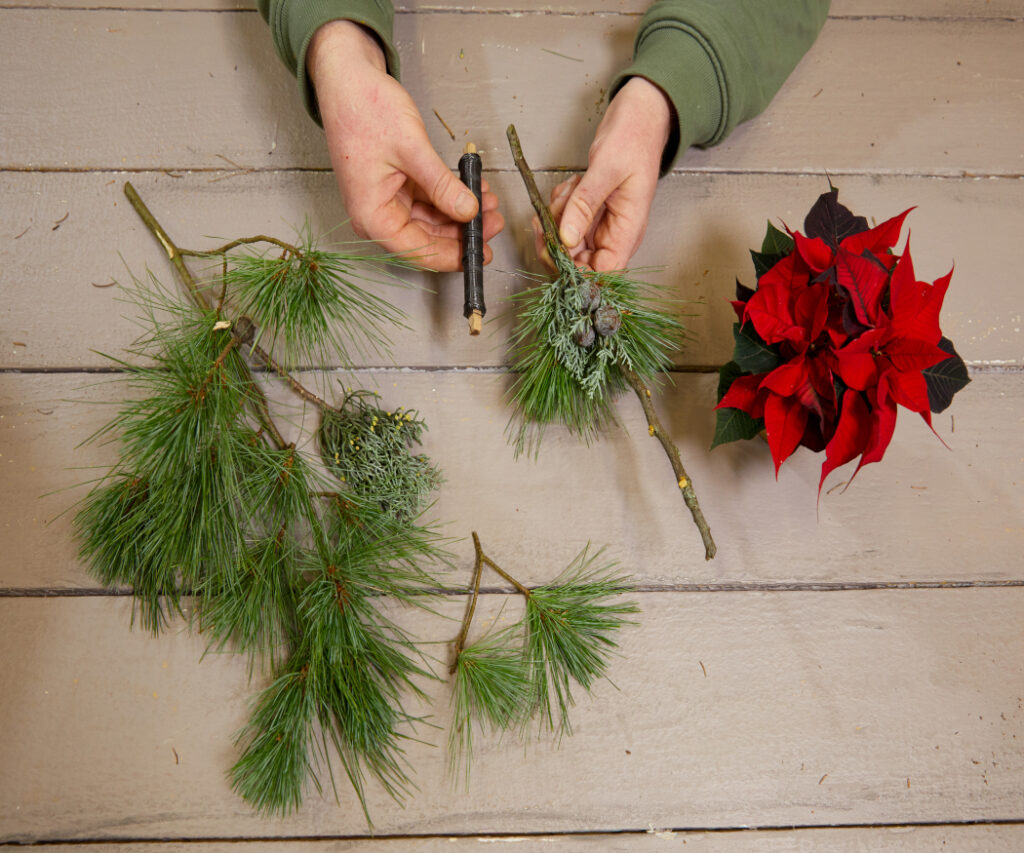
Step 3: Use the scissors to cut small pieces of evergreen foliage, then attach them to the short twigs with the binding wire to create little Christmas trees. Make one of the trees slightly smaller than the others to create a more dynamic arrangement.
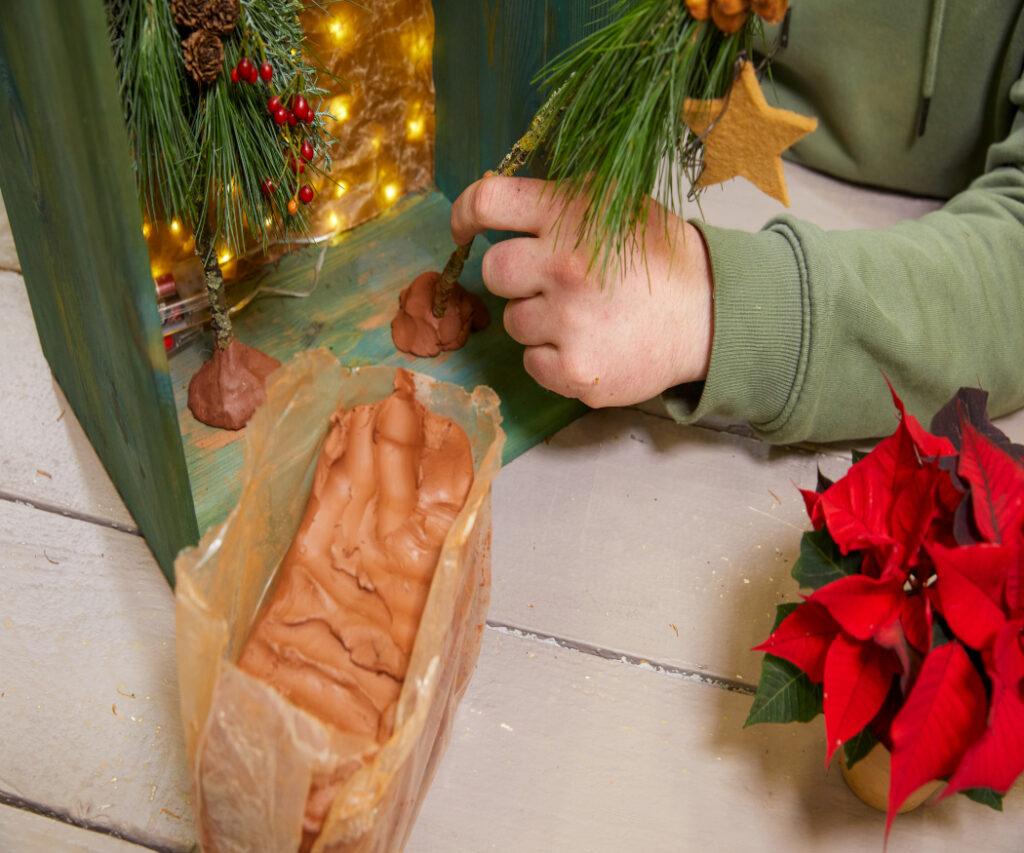
Step 4: Break the pine cones apart and glue the top part of each one to a mini tree to create a tip. Then decorate the trees with the larch cone twigs, rosehips and the star. Attach the trees to the bottom of the wooden box with small lumps of clay to stabilise them.
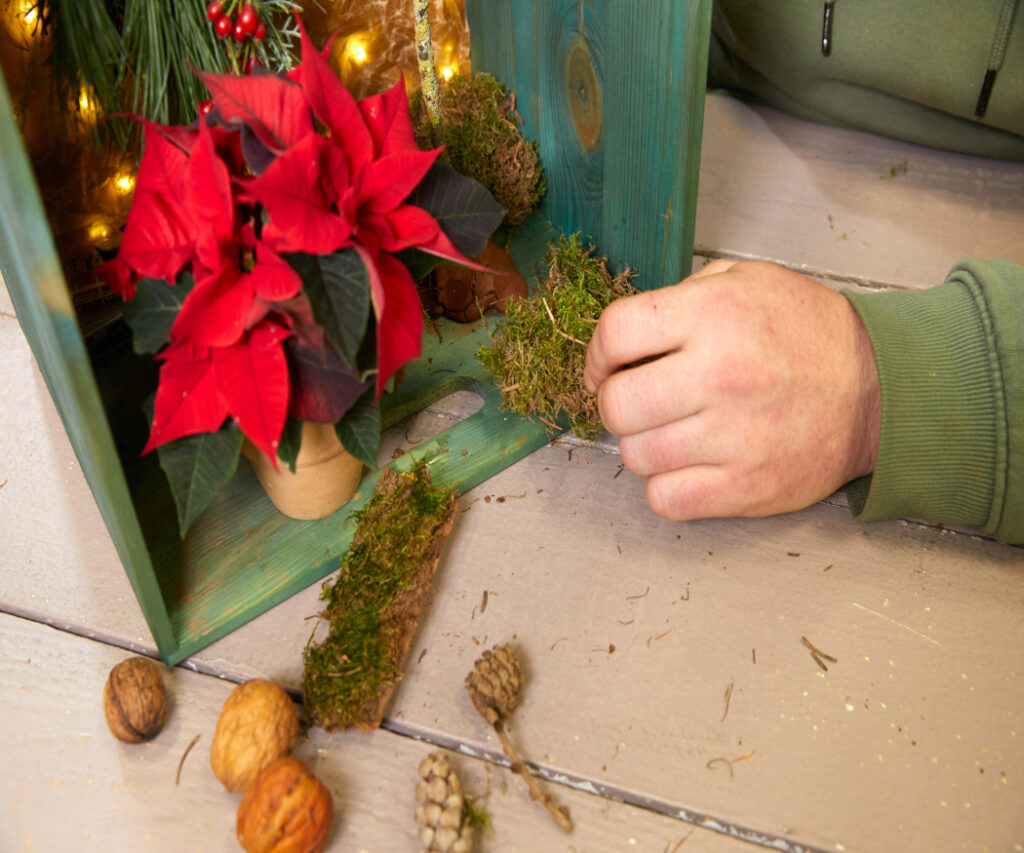
Step 5: Place the potted poinsettia inside the terracotta pot, then place both in the box, lining the bottom with dried moss. Finally decorate with nuts and cones. For an additional touch, include a small forest animal figurine to complete your winter scene.
Poinsettia in a woollen outfit
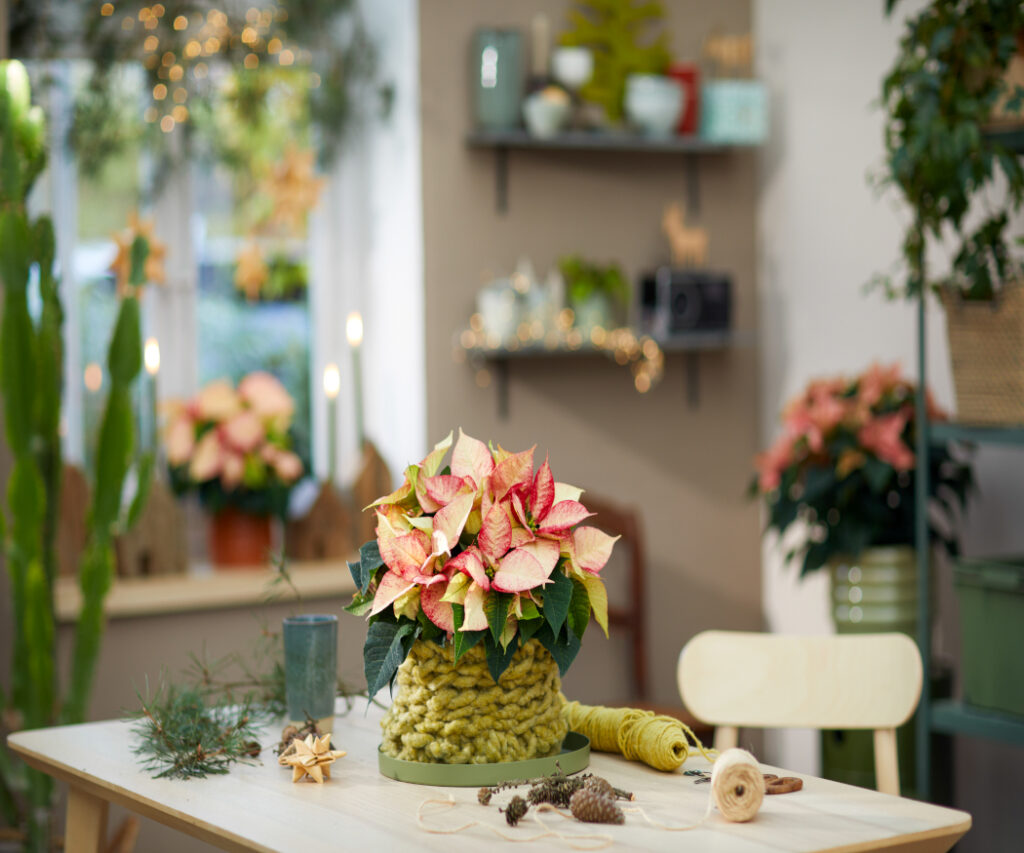
Here, a poinsettia is displayed in a cosy, natural way that makes it a real winter statement piece. A finger-crocheted sleeve made of chunky wool covers the pot, giving the arrangement a warm, handmade touch. Larch cone twigs, moss and pine cones emphasise the natural feel of the design, while a ribbon with a decorative star adds a festive touch. This piece is ideal for use as a table decoration or as a thoughtful gift.